Provisioning
Virtual databases are a virtualized copies of dSource.
Prerequisites
- Required a linked dSource from a source host.
- All prerequisites configured on target environments
- Added compatible target environment on Delphix Engine
Provisioning a VDB
-
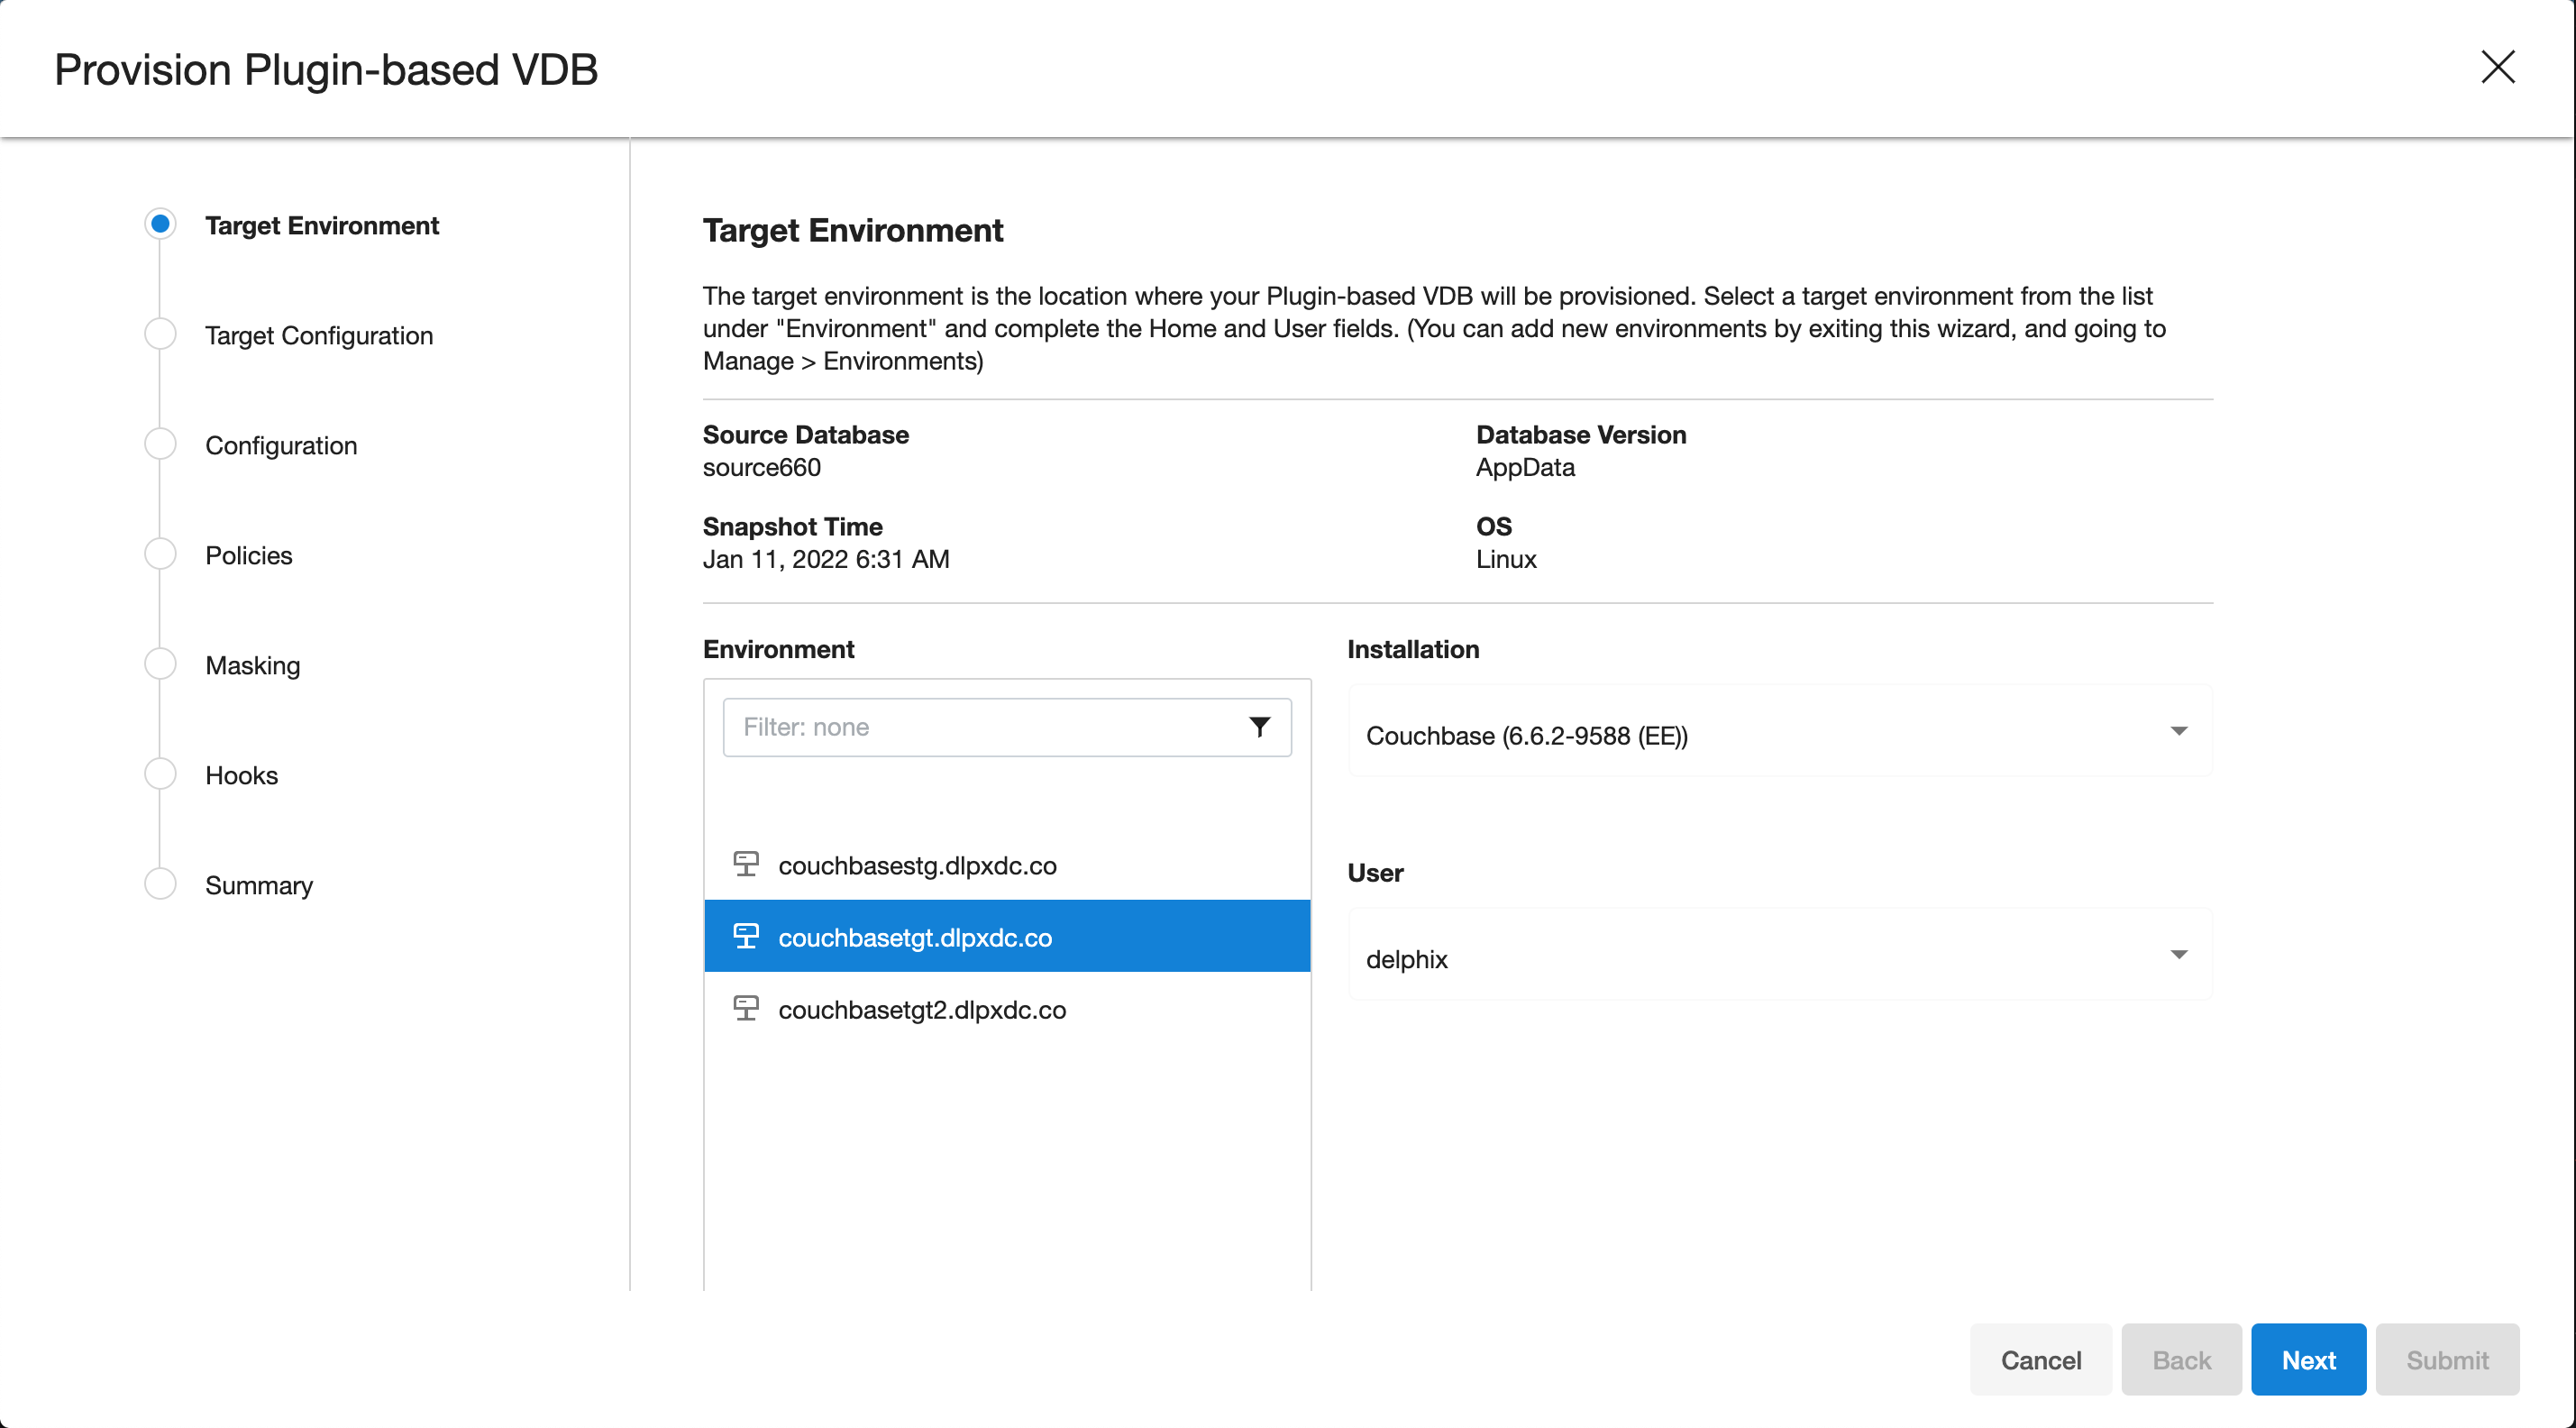
Start a provisioning wizard
-
Select the target host from the dropdown on which VDB needs to be created.
-
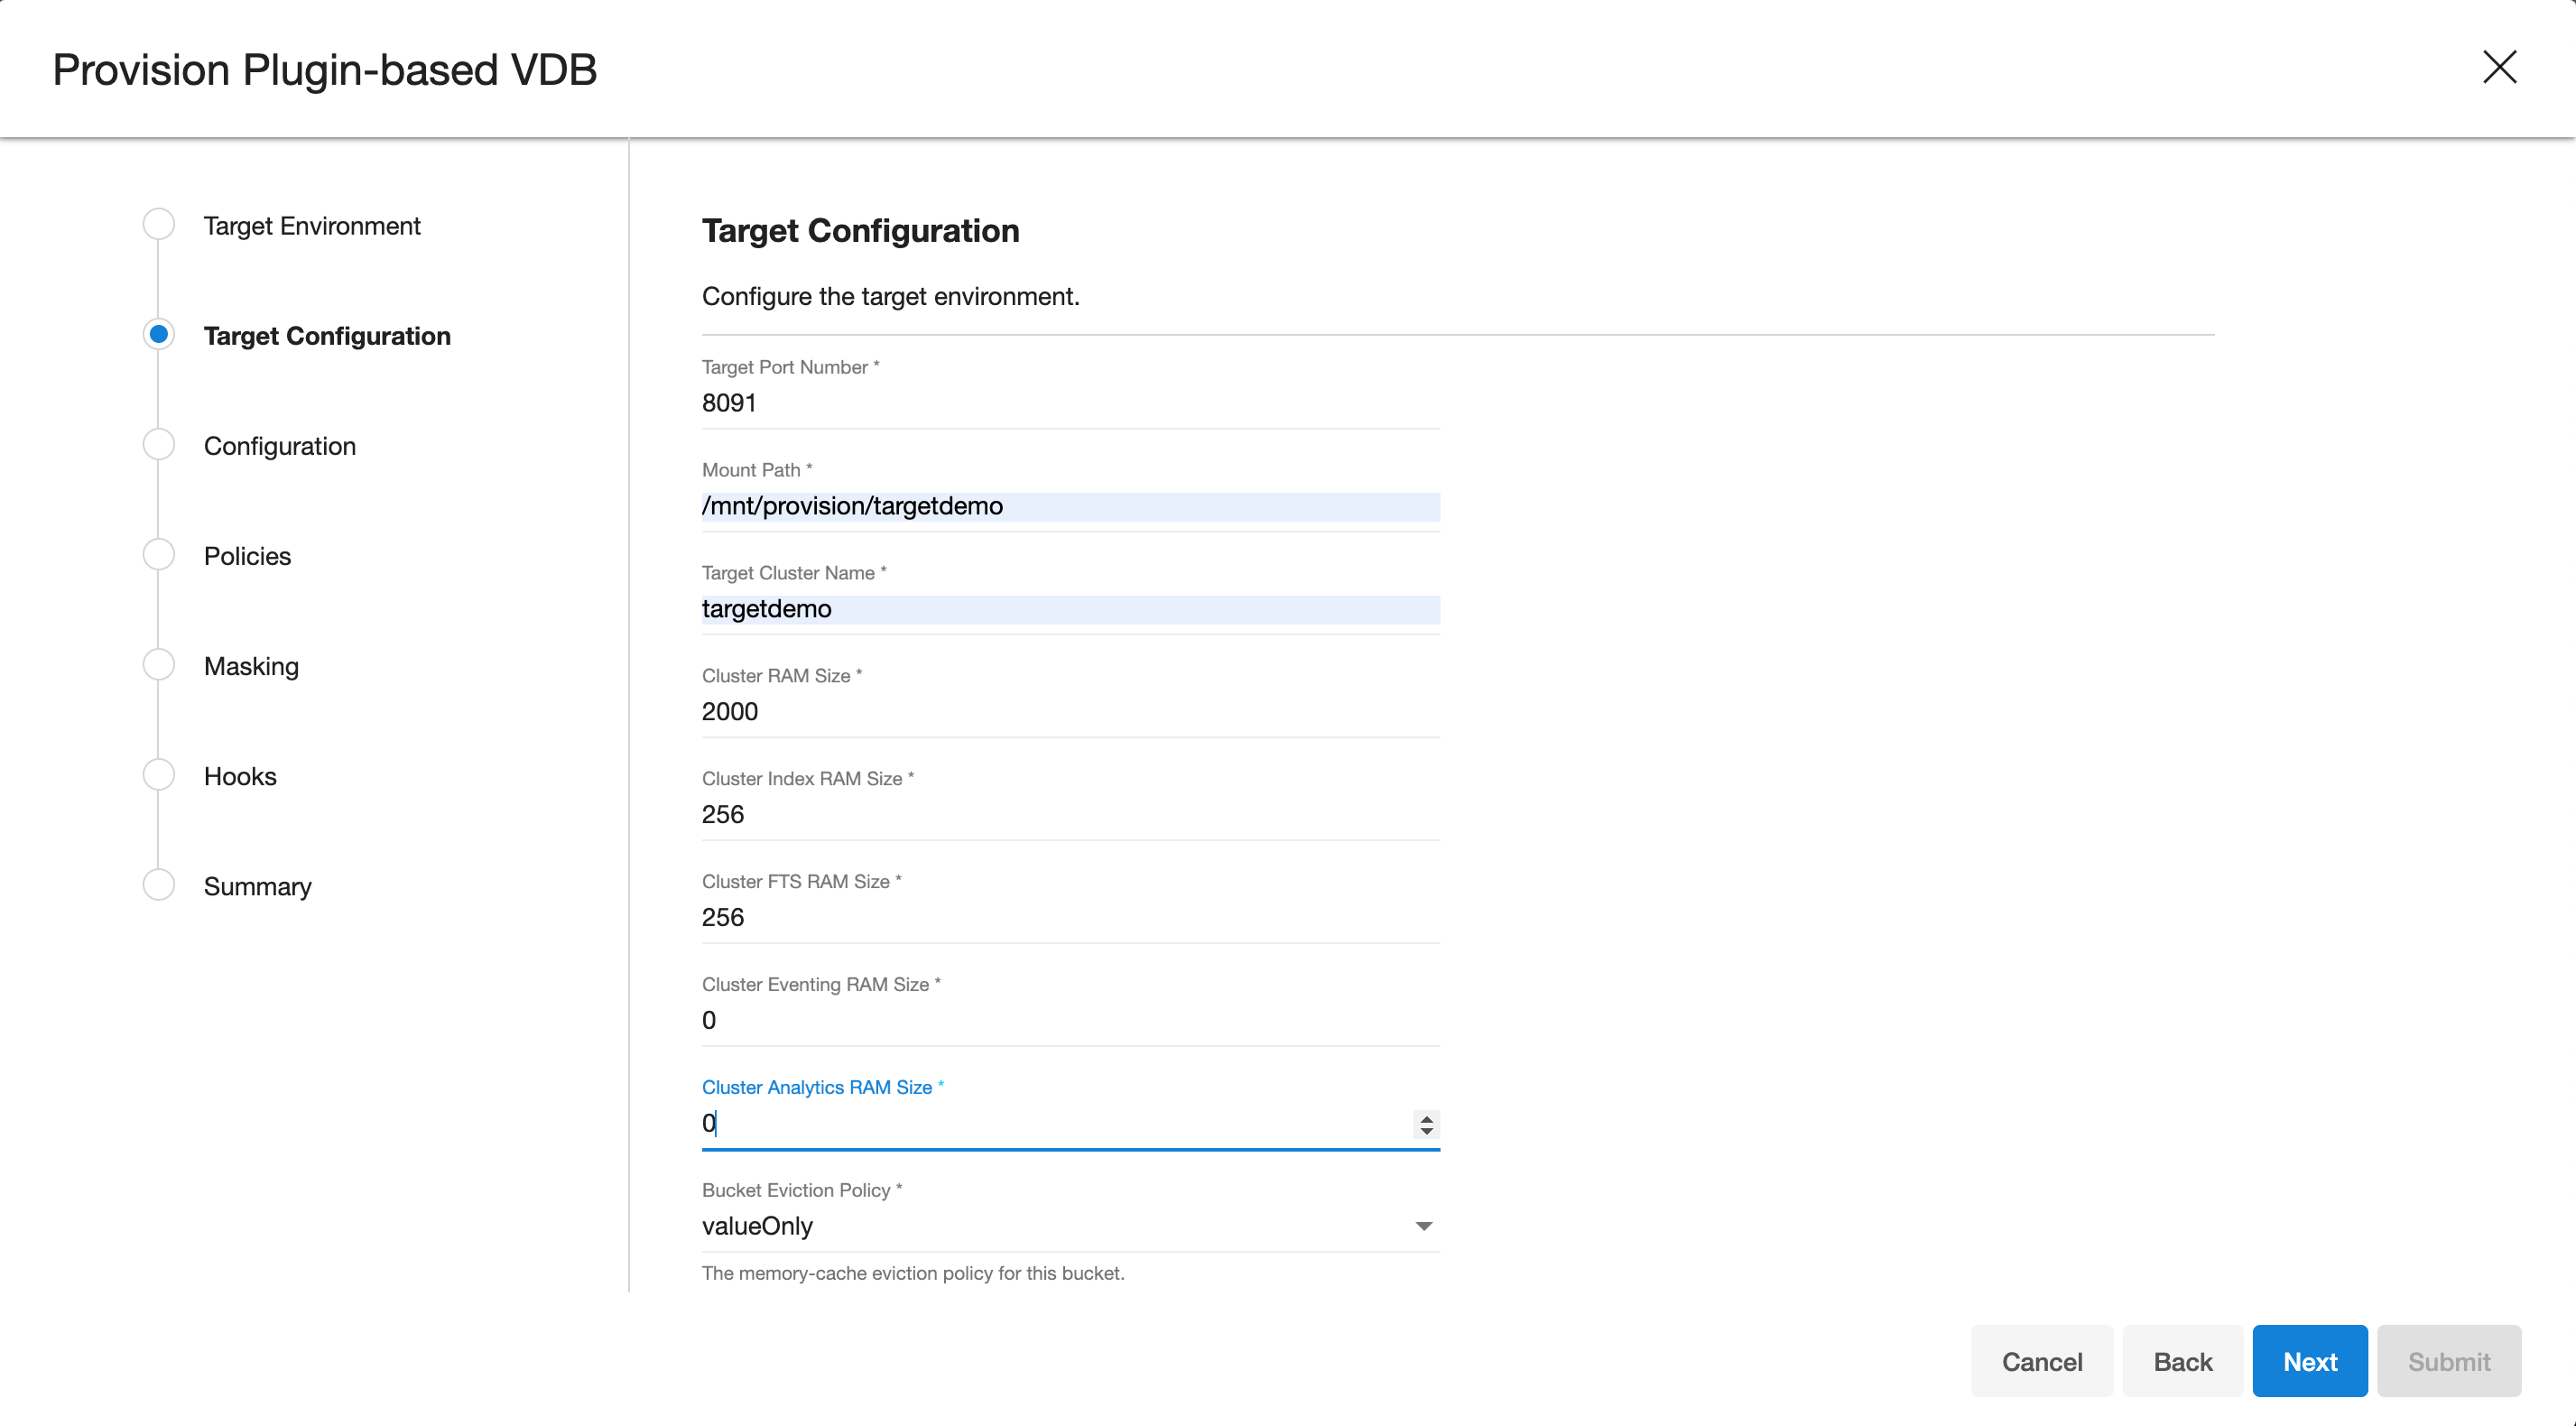
Enter the following values for the target configuration:
- Target Port Number: Port number on which Couchbase services will be started. ( ex. 8091 )
- Mount Path: NFS mount path where dSource snapshot will be mounted by Engine ( ex. /mnt/provision/targetdemo )
- Target Cluster name: Cluster name which is required to be set up on the target host. ( ex. targetdemo )
- Cluster Ram Size: Whole Cluster memory
- Cluster Index Ram Size: Cluster indexer memory
- Cluster FTS Ram Size: Cluster FTS memory ( if needed and FTS service will be configured )
- Cluster Eventing Ram Size: Cluster Eventing memory ( if needed and Eventing service will be configured )
- Cluster Analytics Ram Size: Cluster Analytics memory ( if needed and Analytics service will be configured )
-
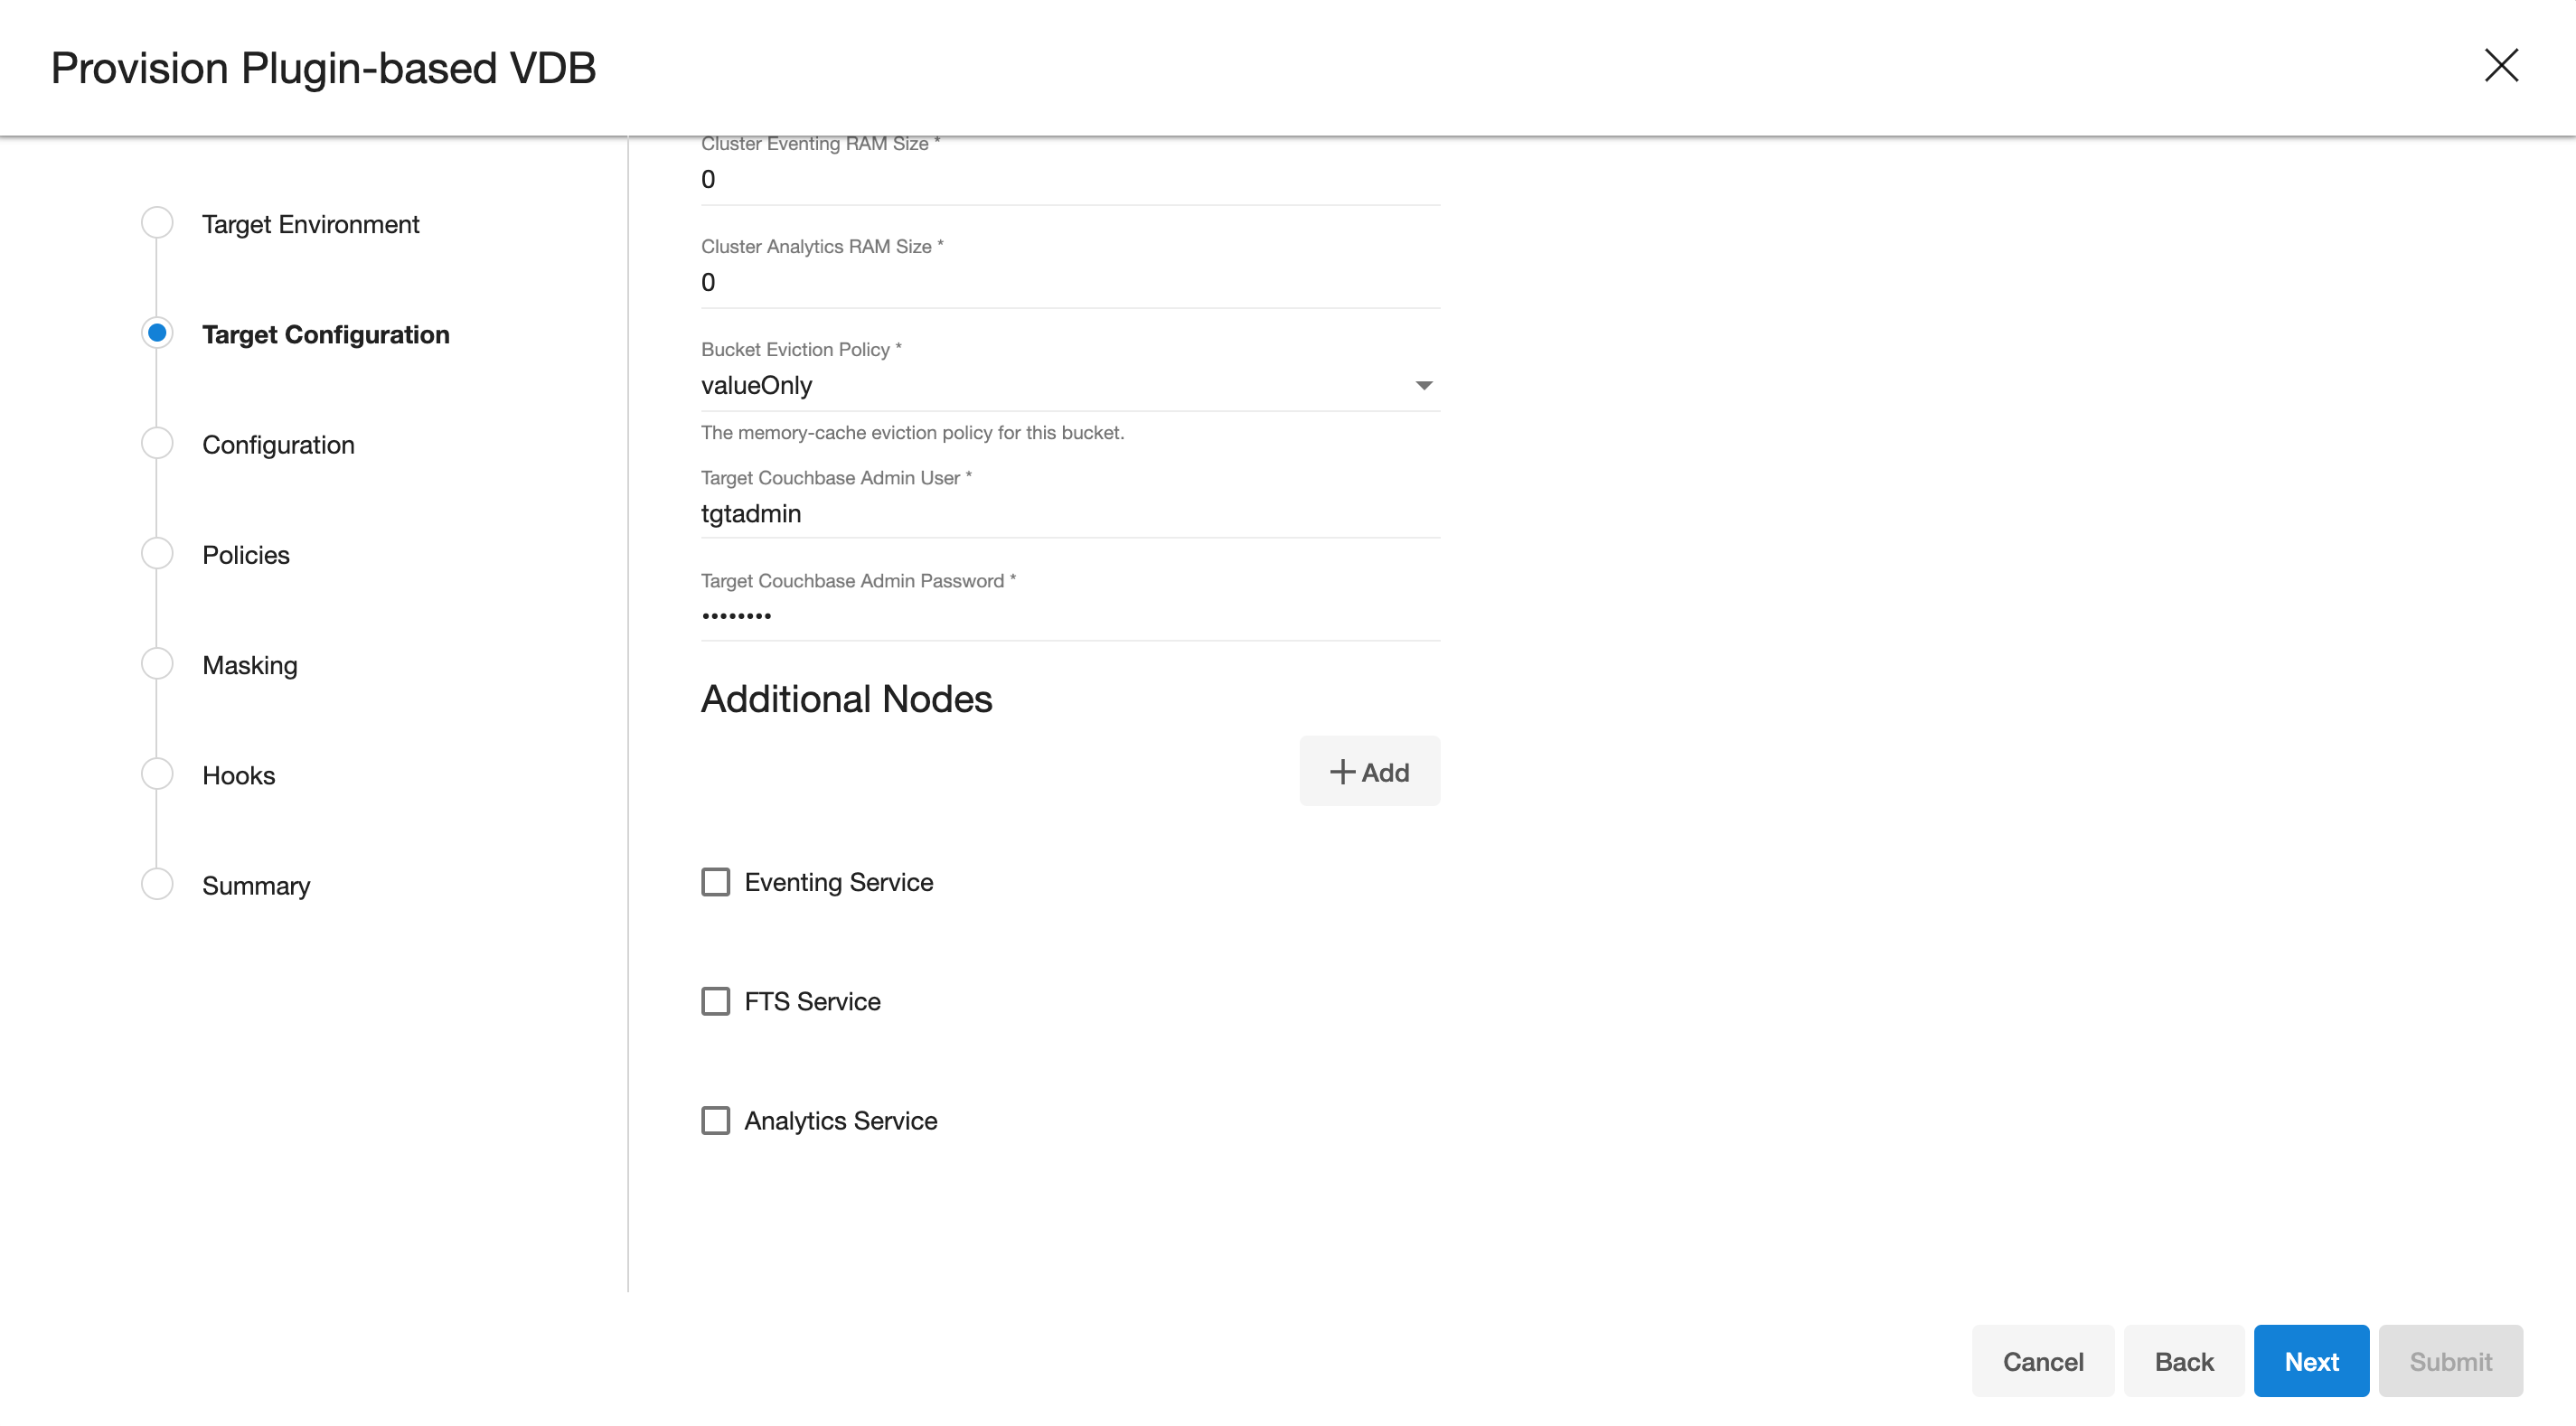
Enter the following values for the target configuration:
- Target couchbase Admin User: Target Cluster admin username
- Target couchbase Admin password: Target Cluster admin password
- Select services needed on the target cluster ( FTS, Eventing, Analytics )
-
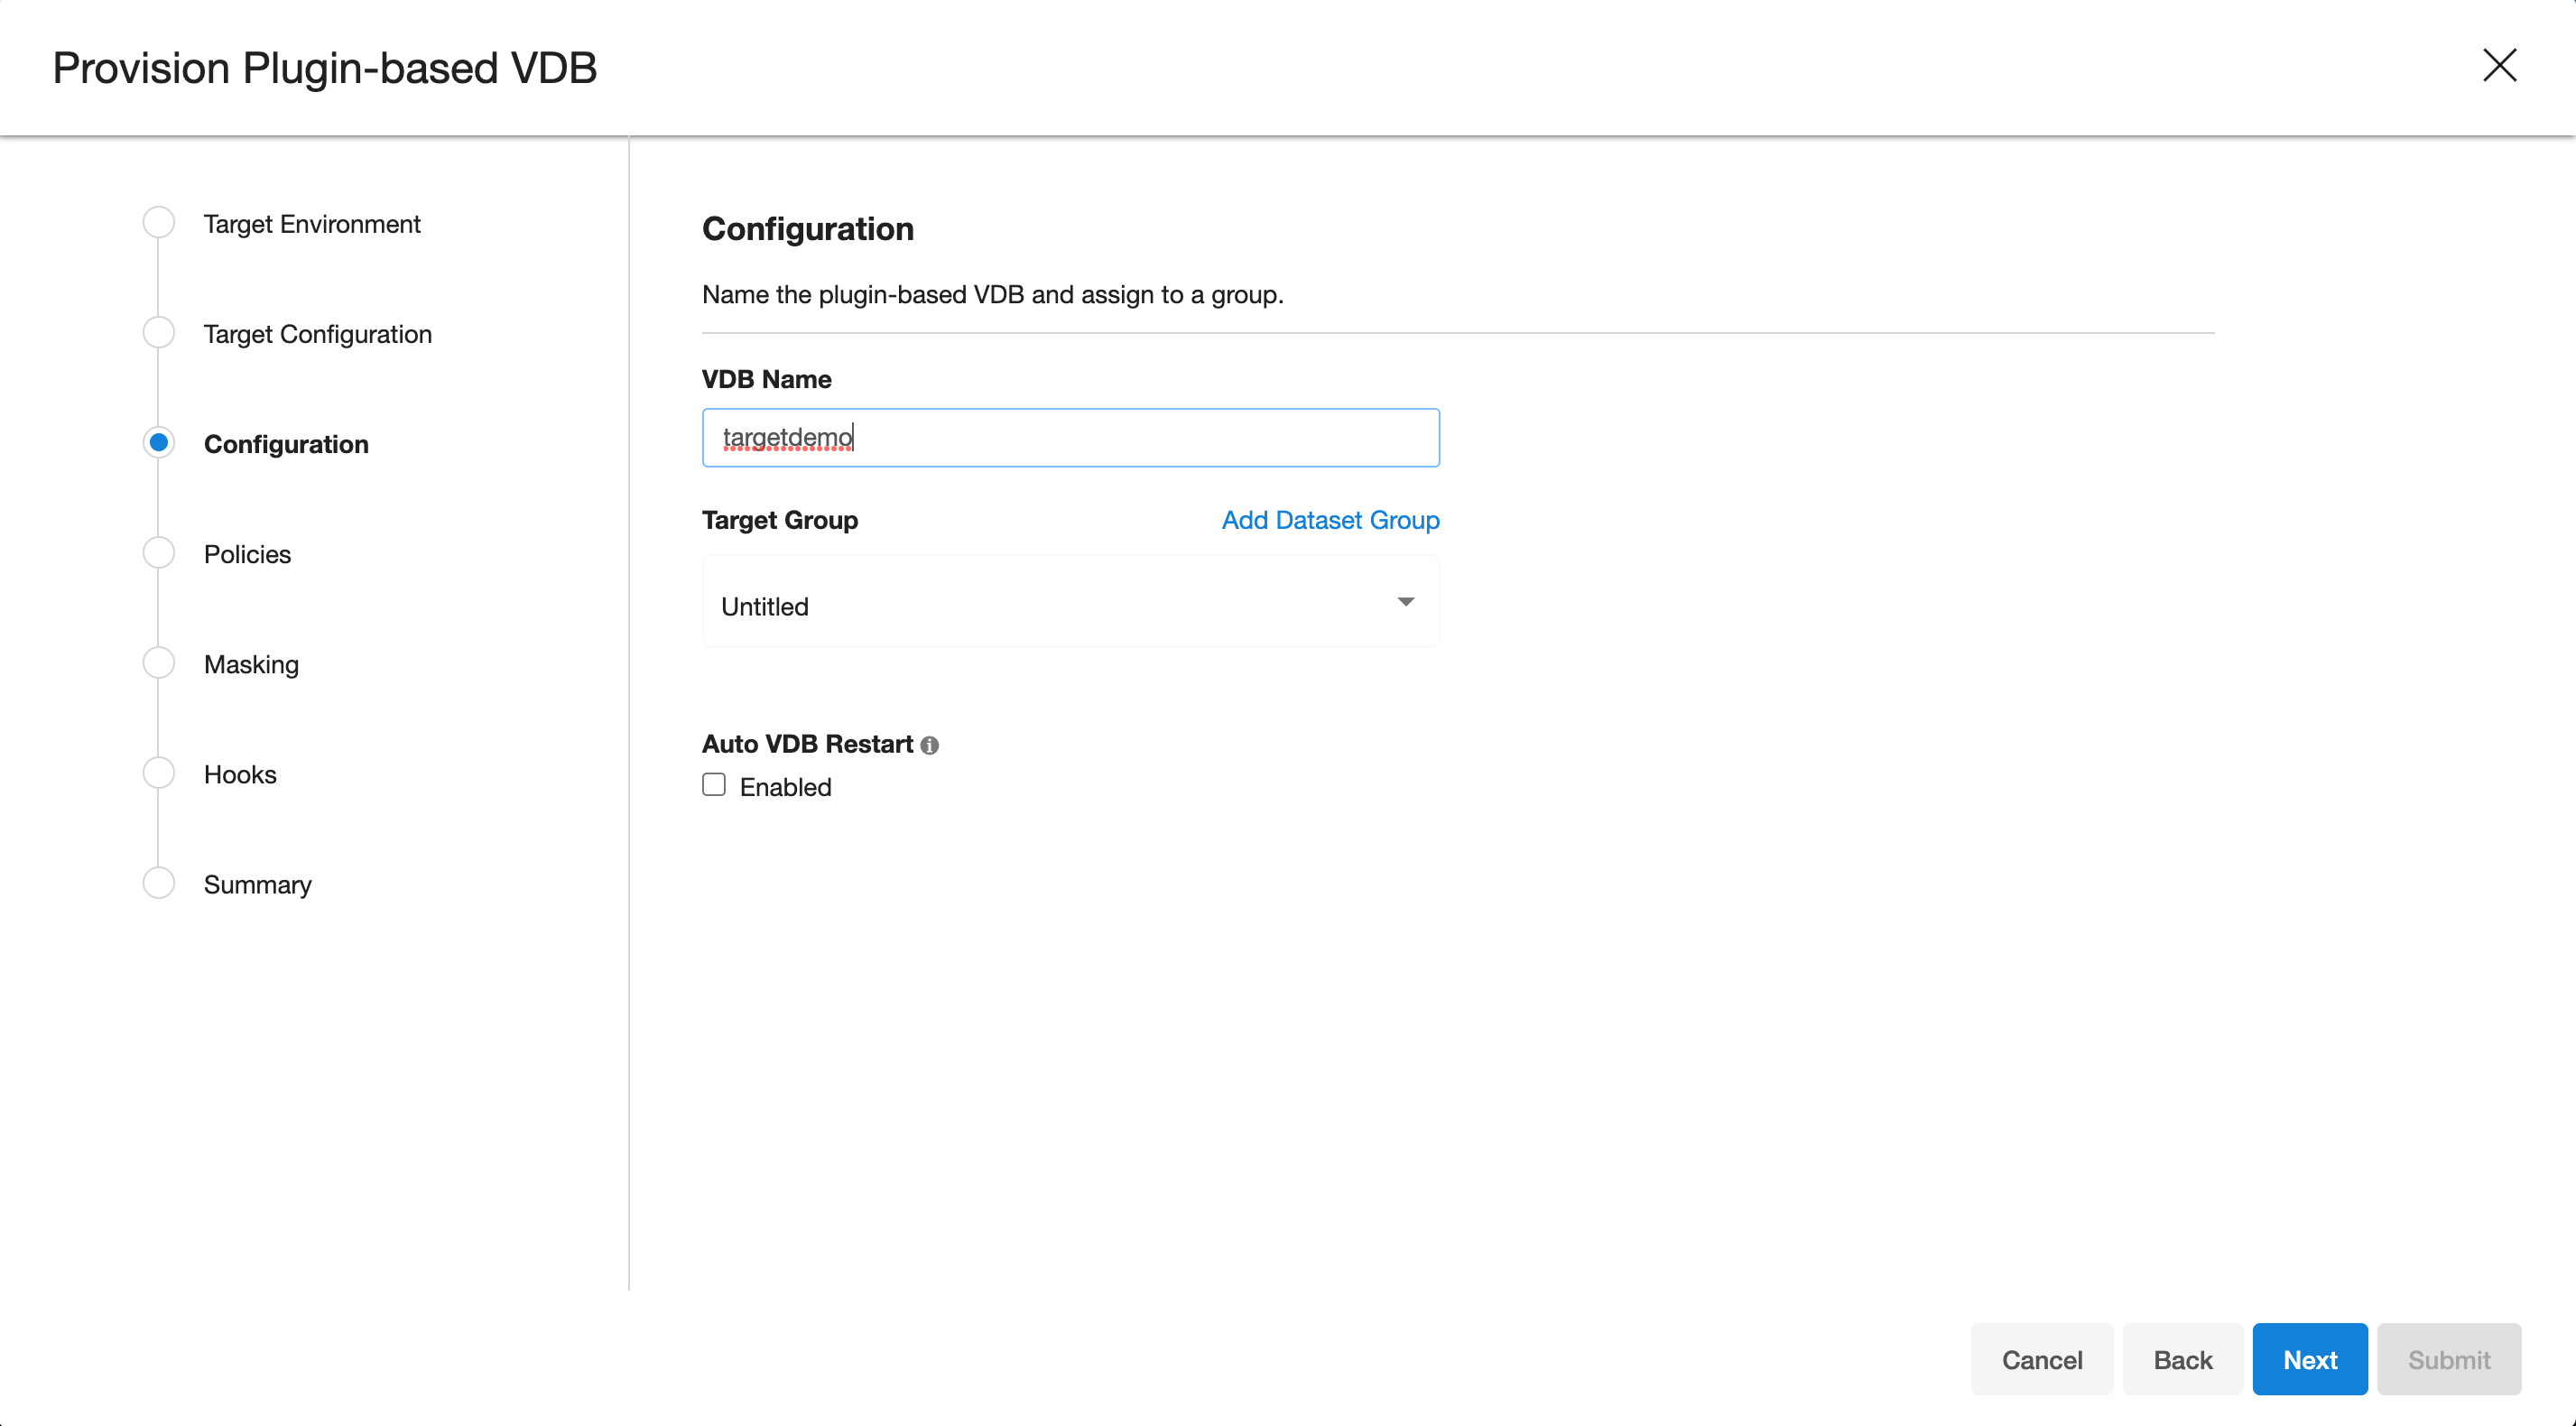
Provision plugin based VDB. Enter the follwing value:
- VDB Name: Delphix Target Cluster name
- Target group: Delphix Target Cluster group
-
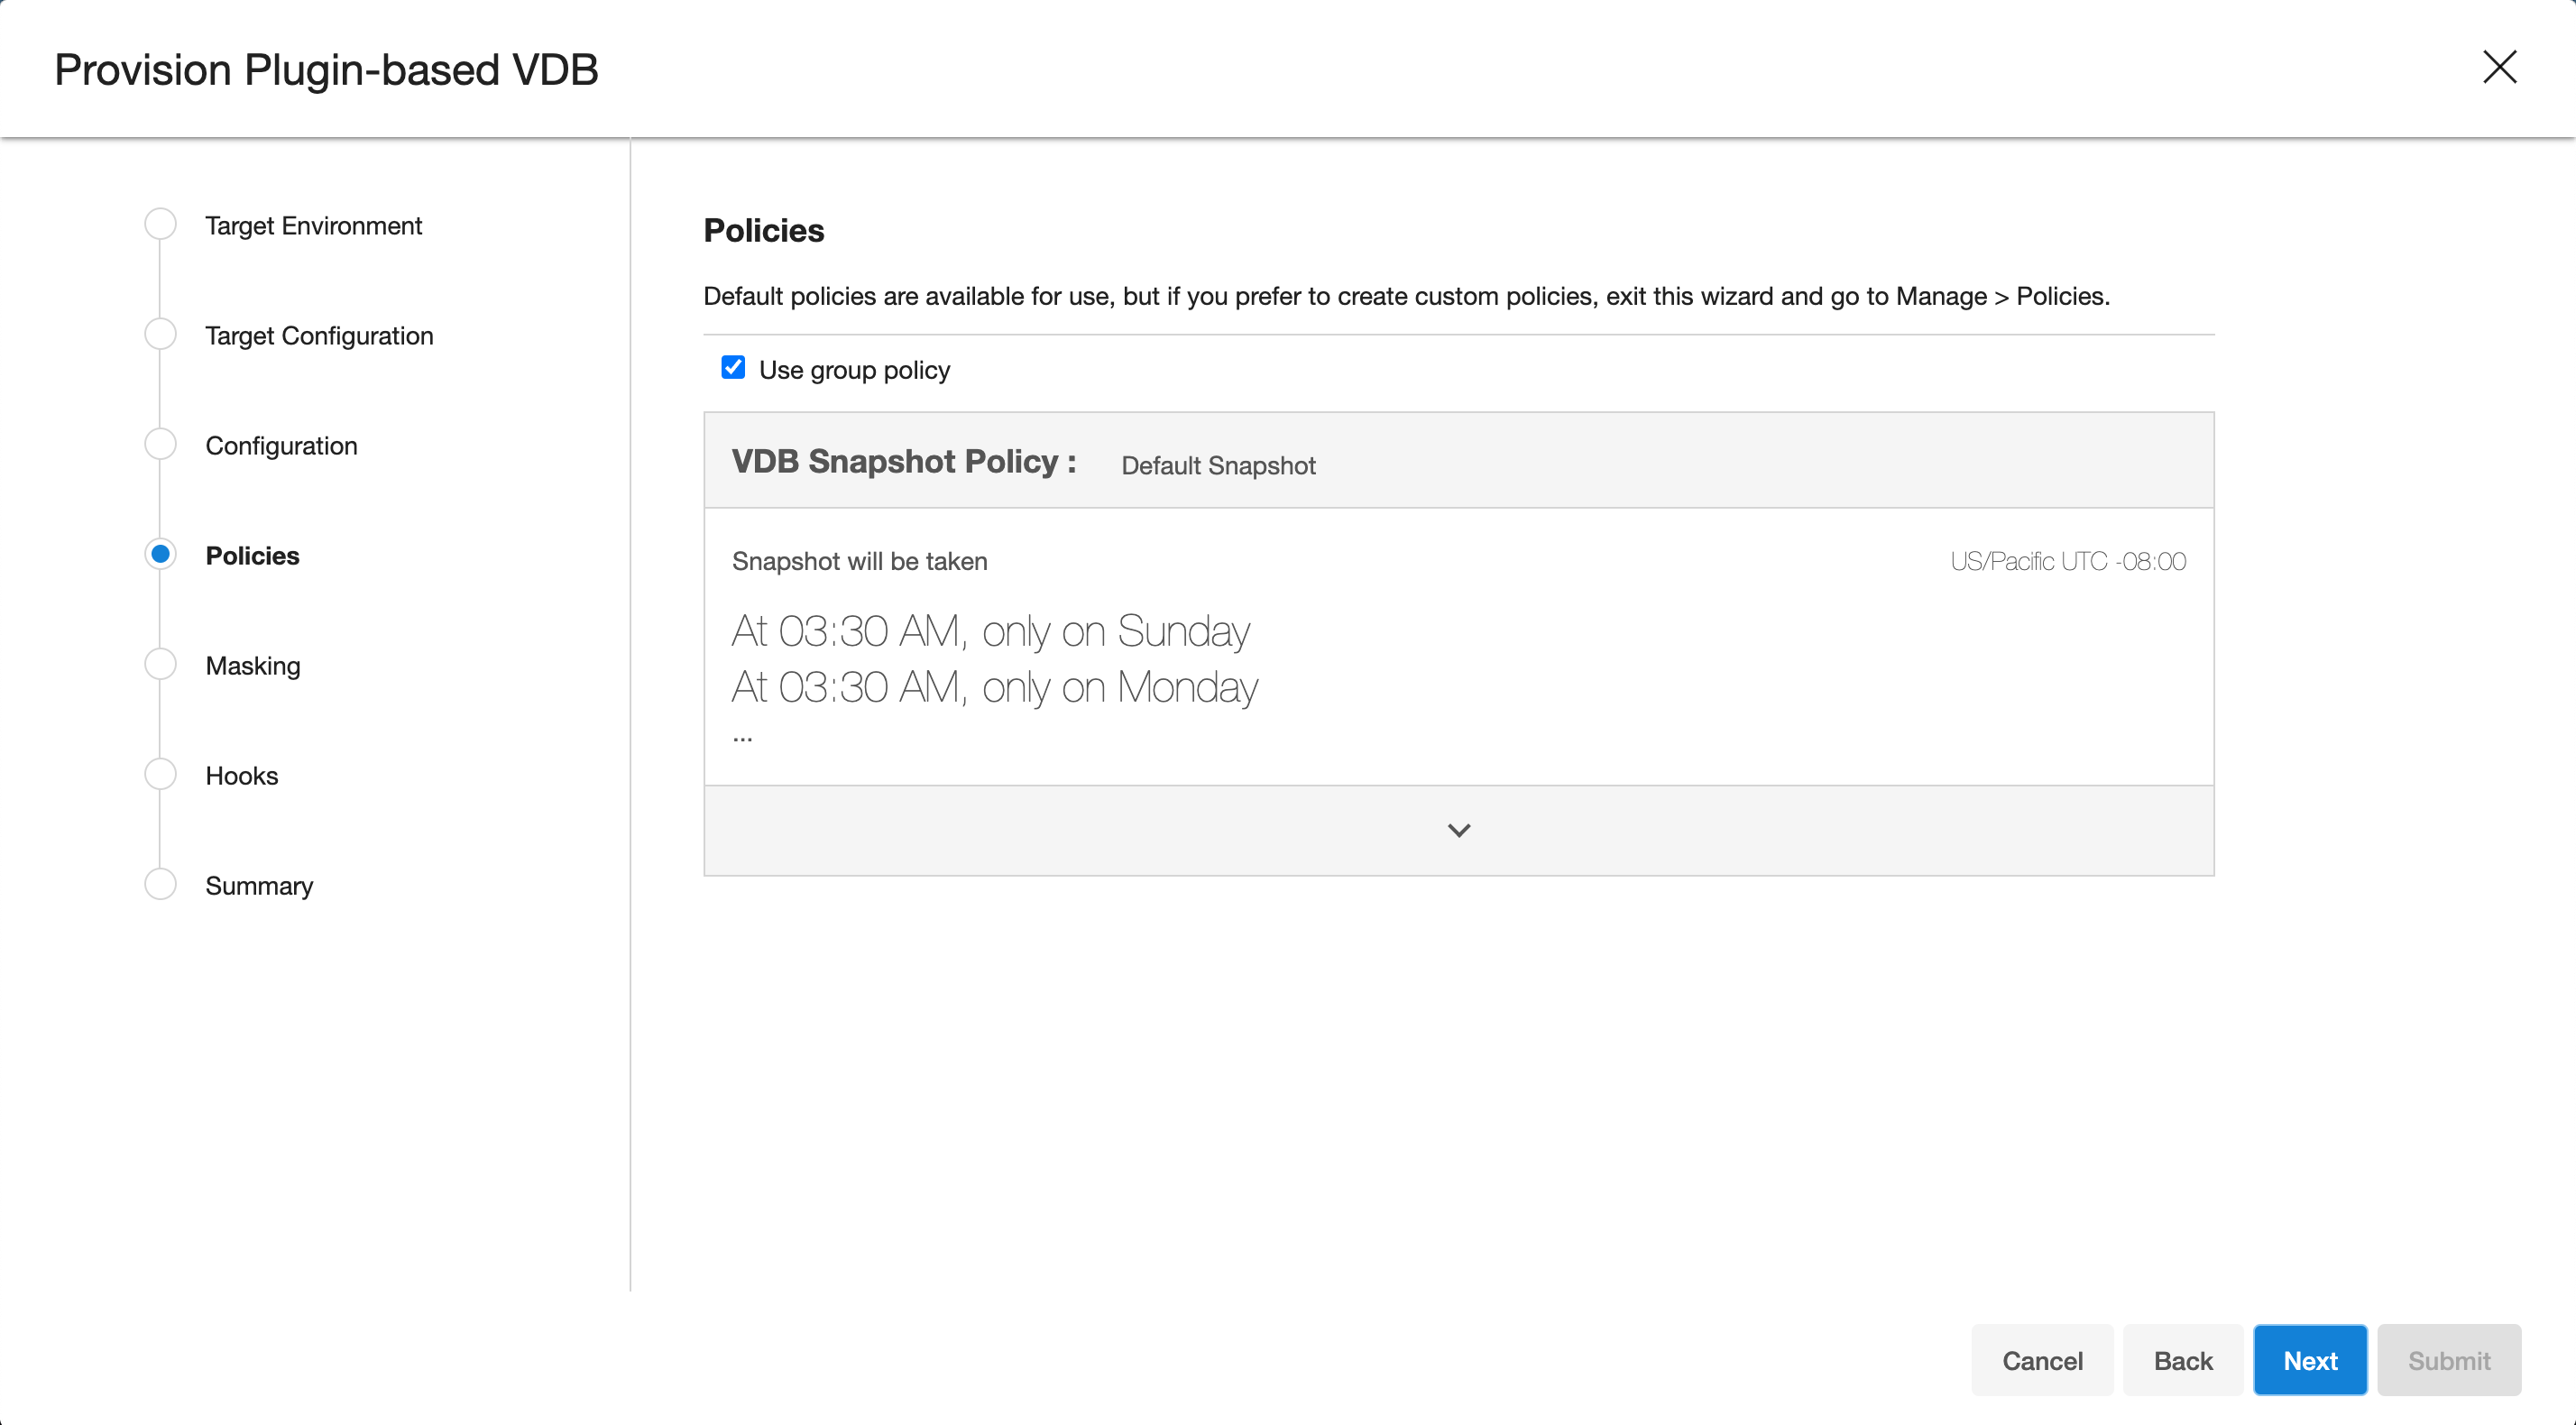
Select a policy for VDB, select Next.
-
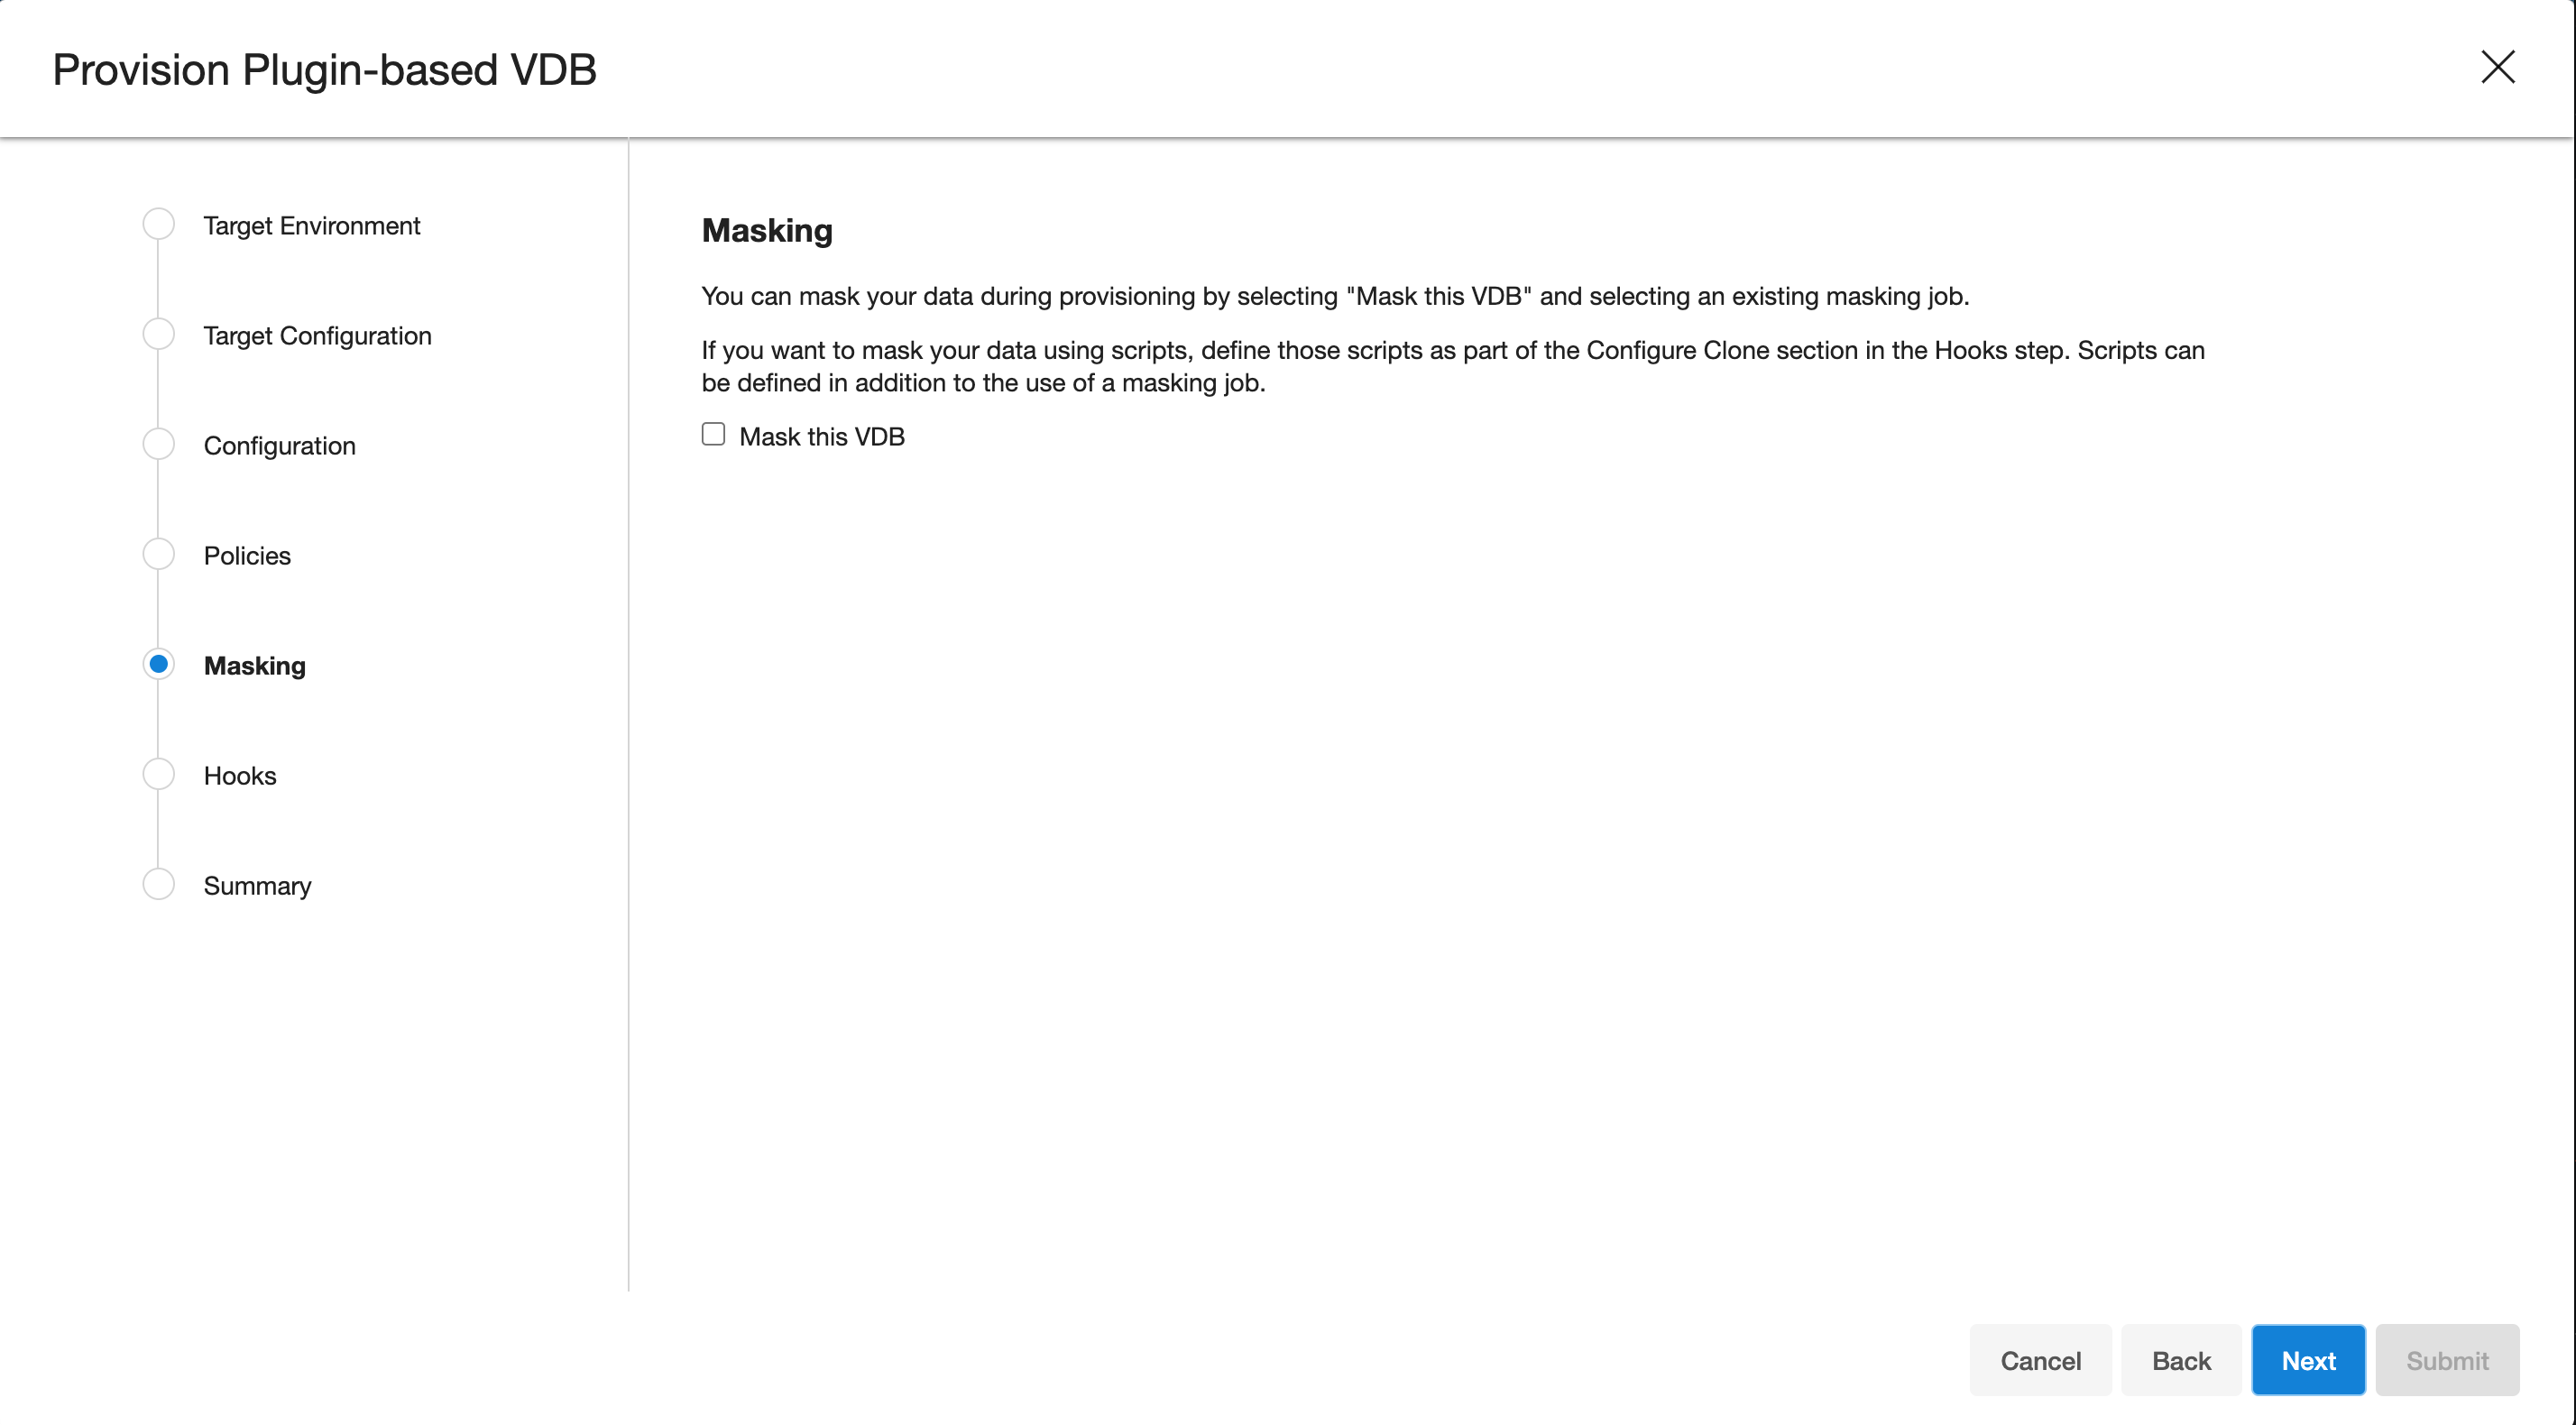
Select masking for VDB if needed, select Next
-
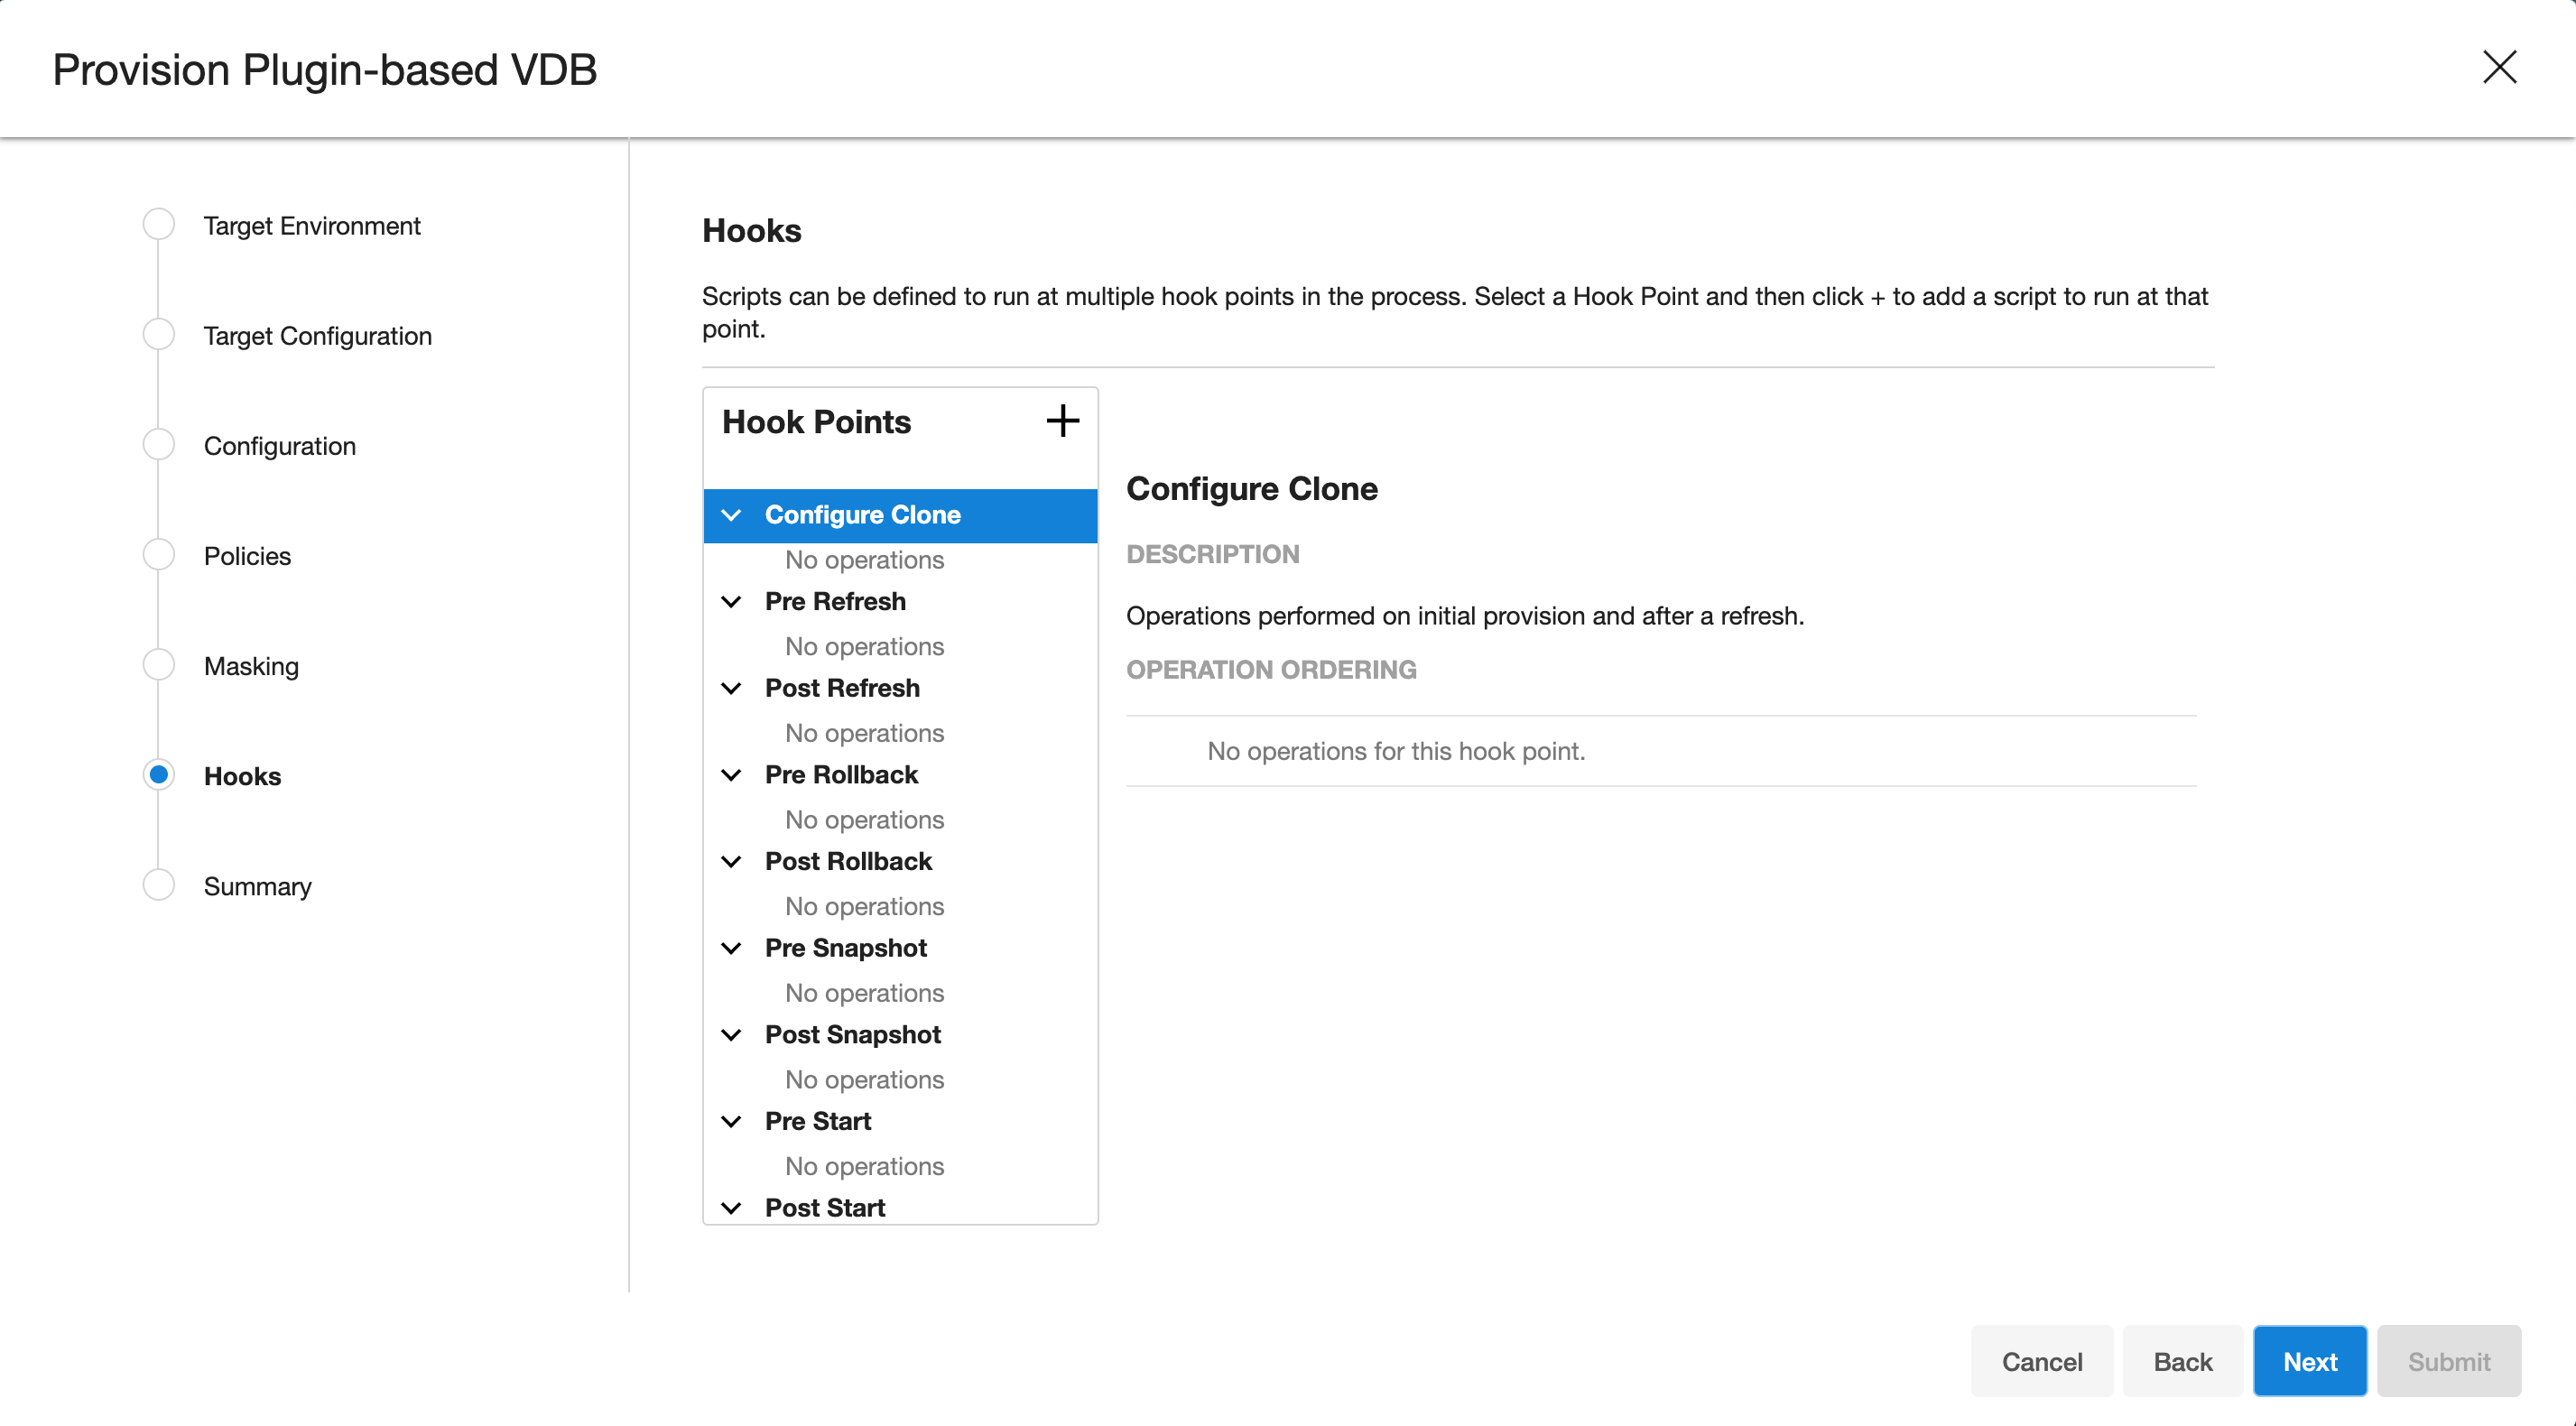
Add hooks for VDB if needed, select Next
-
Preview the summary and select Submit
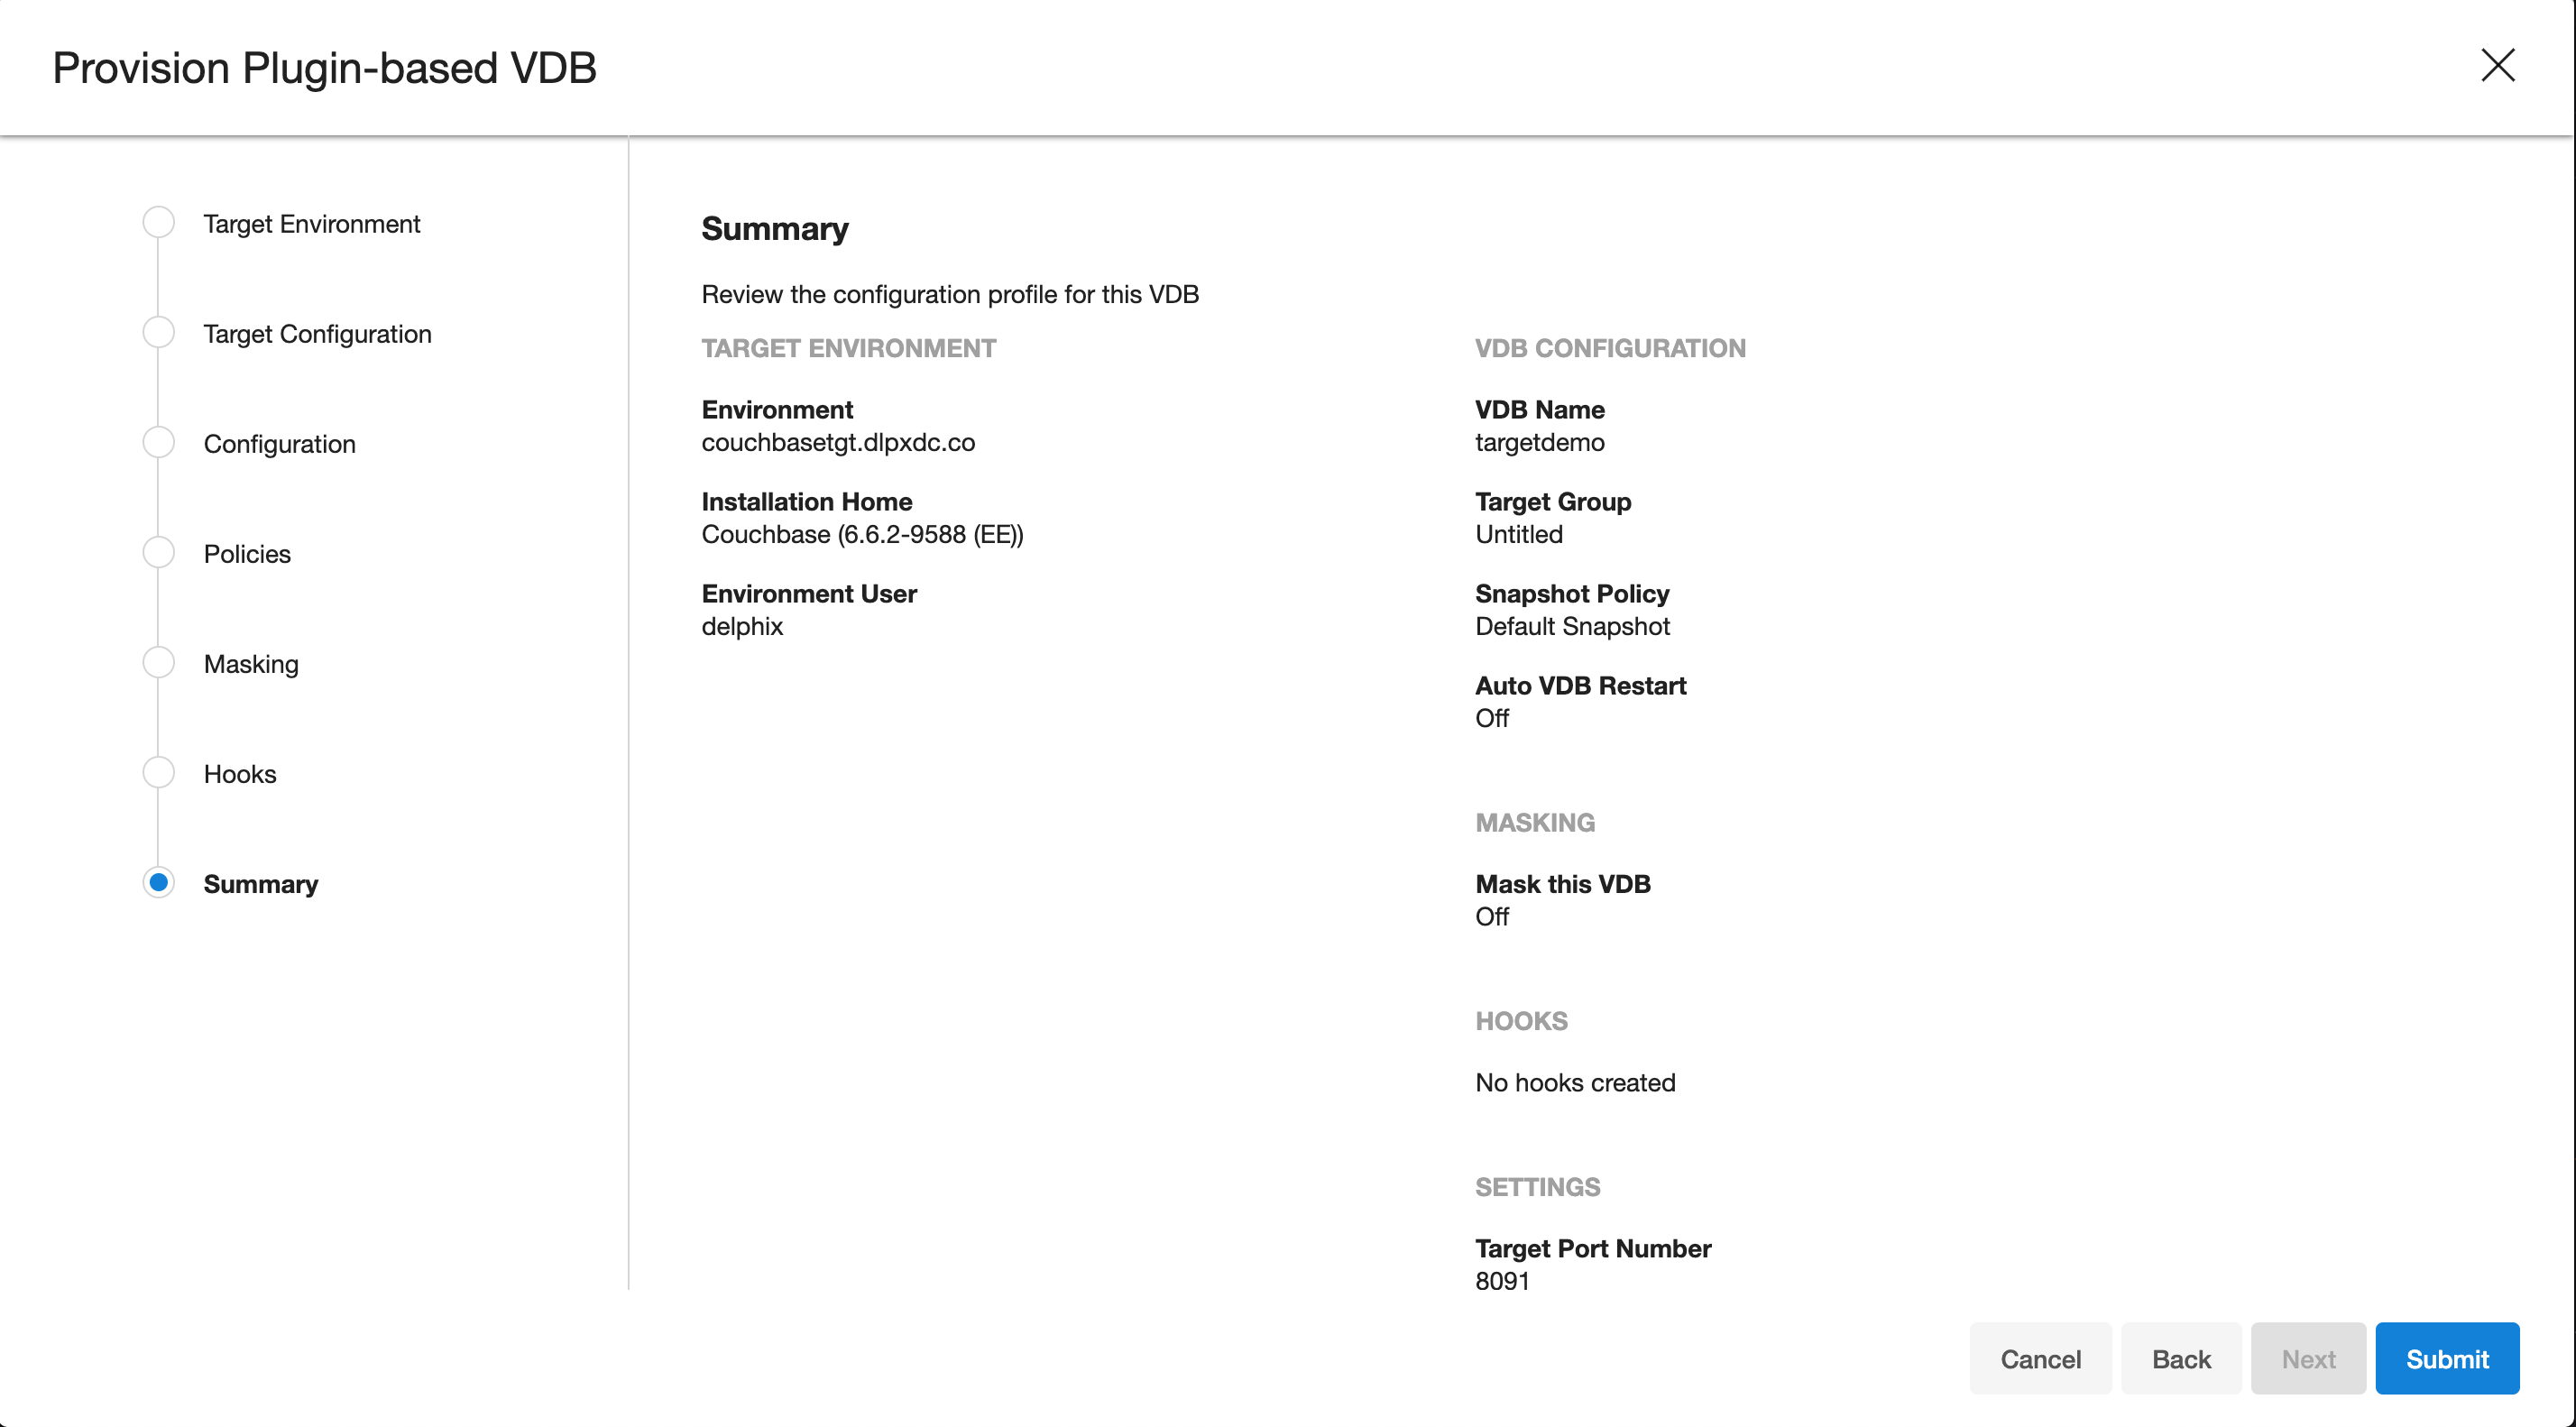
-
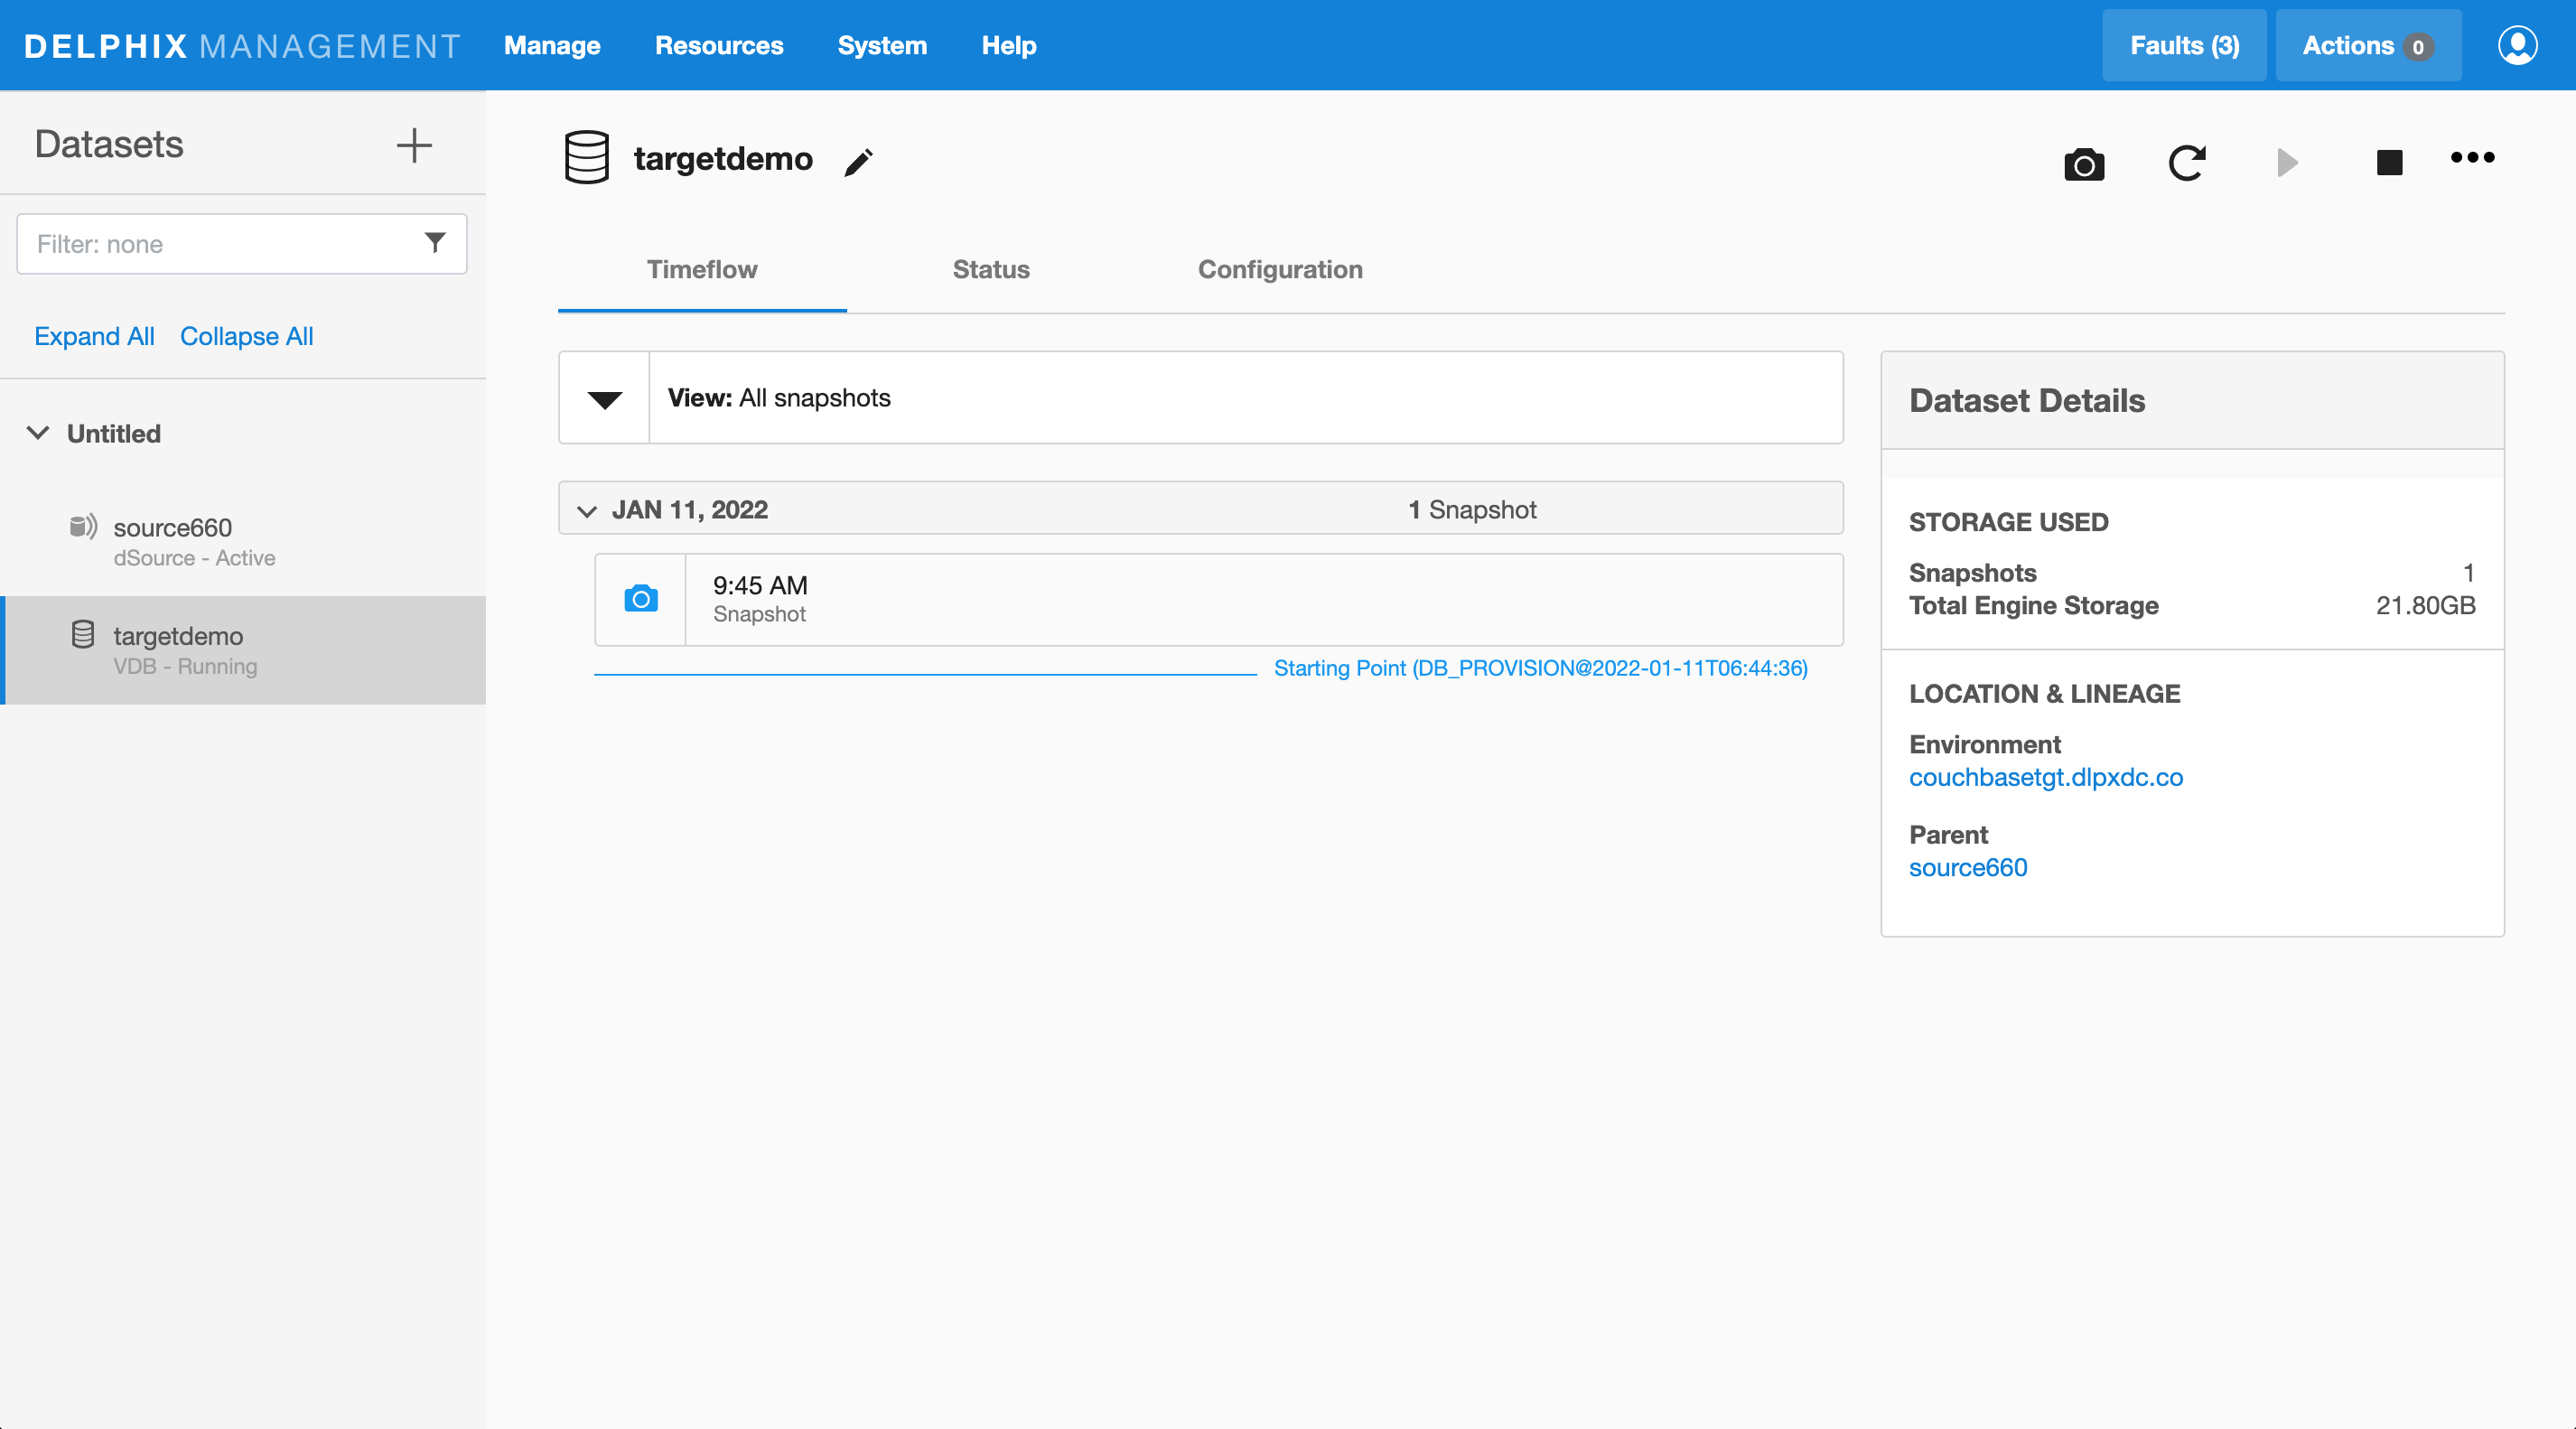
Once the VDB is created successfully, you can review the datasets on Manage > Datasets > vdb Name.
Provisioning a Multinode VDB
-
Start a provisioning wizard
-
Select the target host from the dropdown on which VDB needs to be created.
-
Enter the following values for the target configuration:
- Target Port Number: Port number on which Couchbase services will be started. ( ex. 8091 )
- Mount Path: NFS mount path where dSource snapshot will be mounted by Engine ( ex. /mnt/provision/targetdemo )
- Target Cluster name: Cluster name which is required to be set up on the target host. ( ex. targetdemo )
- Cluster Ram Size: Whole Cluster memory
- Cluster Index Ram Size: Cluster indexer memory
- Cluster FTS Ram Size: Cluster FTS memory ( if needed and FTS service will be configured )
- Cluster Eventing Ram Size: Cluster Eventing memory ( if needed and Eventing service will be configured )
- Cluster Analytics Ram Size: Cluster Analytics memory ( if needed and Analytics service will be configured )
-
Enter the following values for the target configuration:
- Target couchbase Admin User: Target Cluster admin username
- Target couchbase Admin password: Target Cluster admin password
- Select services needed on the first node of the cluster ( FTS, Eventing, Analytics )
-
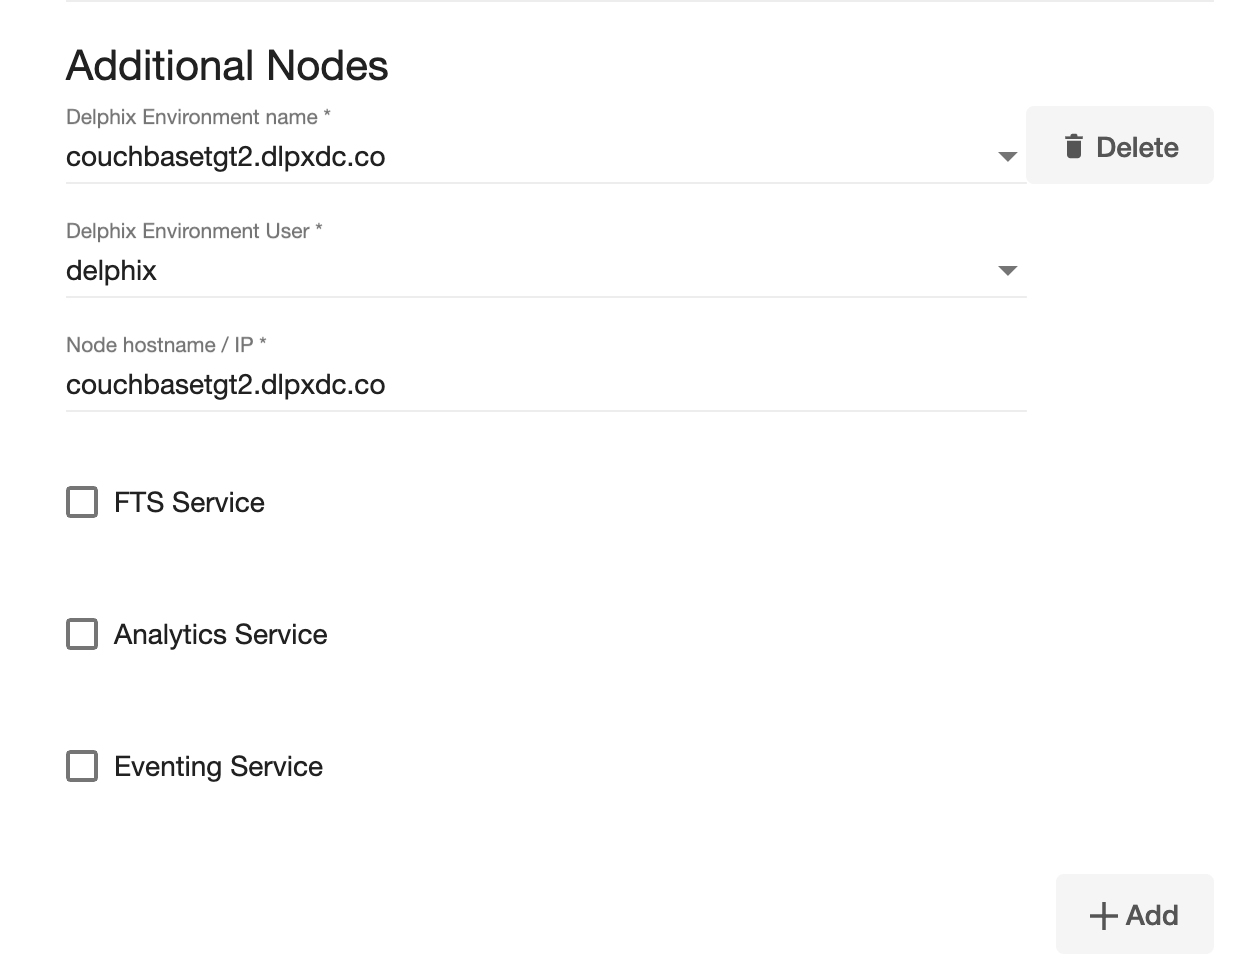
Click Add buton to open a dialog box for additional node. If you need more nodes, click Add button again to add more nodes

-
Enter the following values for each node:
- Delphix Environment Name: Select an additional node environment from drop-down menu
- Delphix Environment User: Select an environment user
- Node hostname / IP: Enter a hostname or IP of the new node - it will be used as a server name in Couchbase configuration
- Select services needed on the additional node of the cluster ( FTS, Eventing, Analytics )
-
Provision plugin based VDB. Enter the follwing value:
- VDB Name: Delphix Target Cluster name
- Target group: Delphix Target Cluster group
-
Select a policy for VDB, select Next.
-
Select masking for VDB if needed, select Next
-
Add hooks for VDB if needed, select Next
-
Preview the summary and select Submit
-
Once the VDB is created successfully, you can review the datasets on Manage > Datasets > vdb Name.
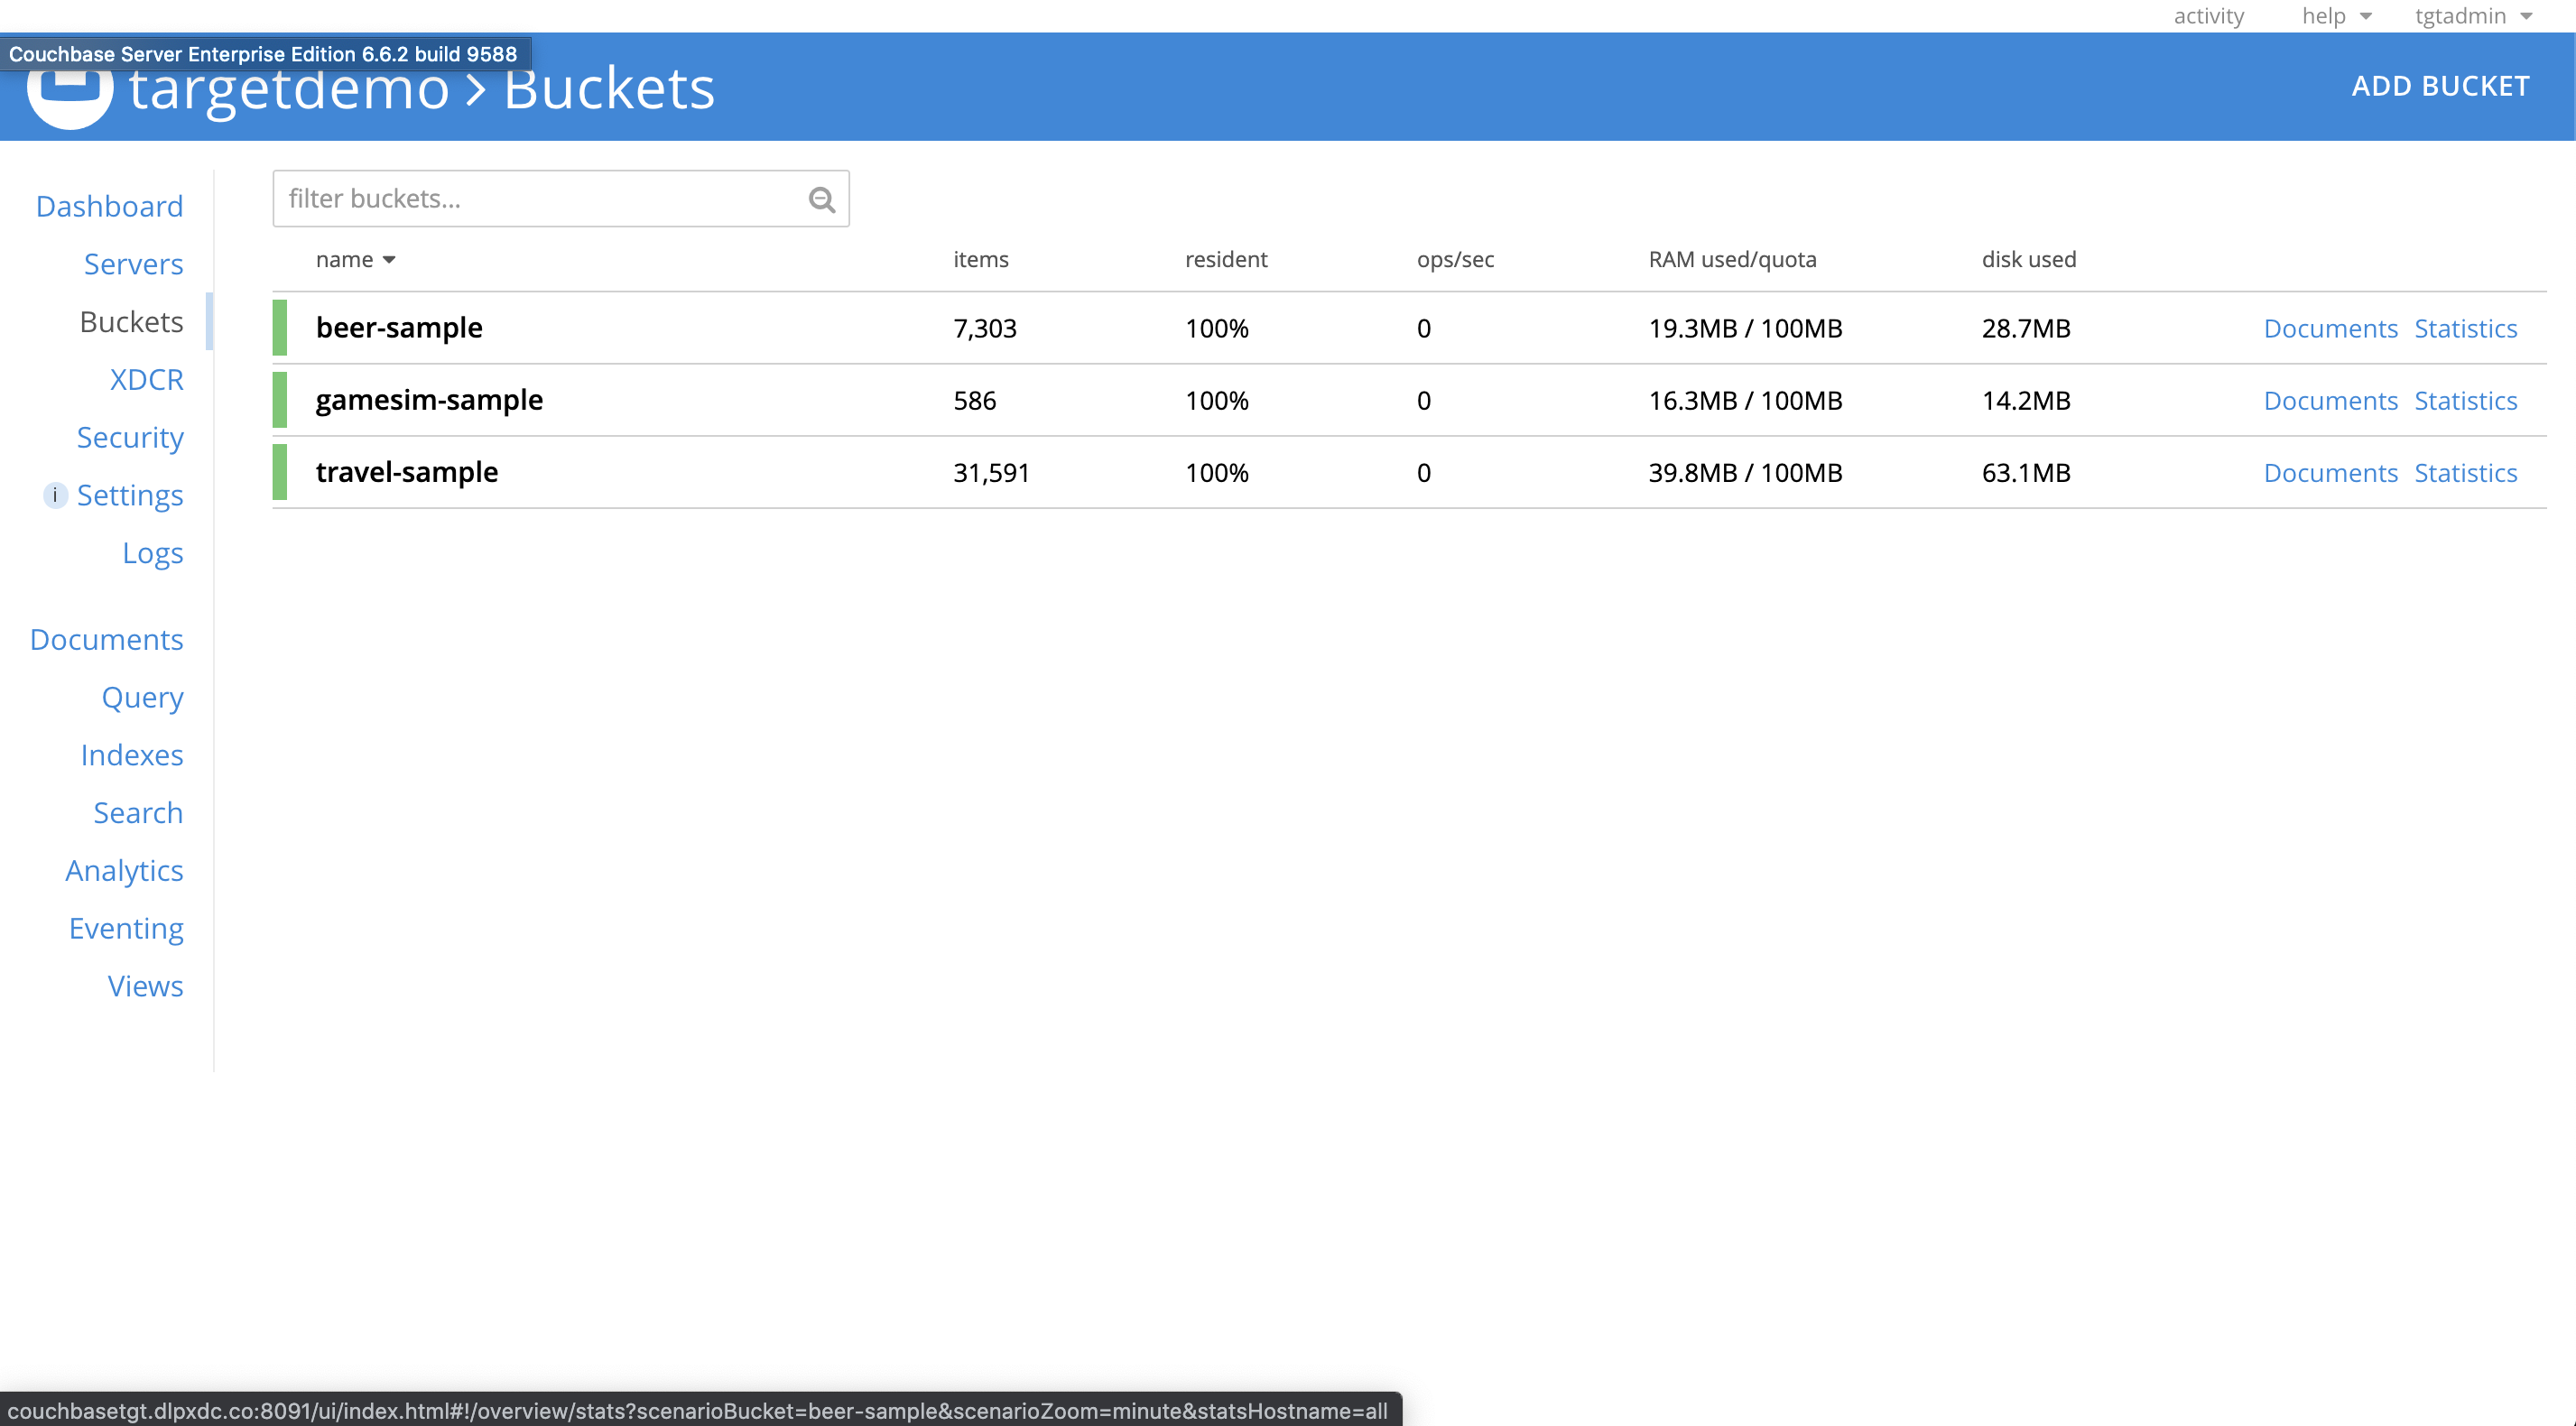
Accesssing Target VDB Cluster
Use a IP / Hostname of the target environment and VDB port defined above to access Target Cluster VDB. Admin user name and password are defined based on input from point 4.
An example screenshot of Couchbase Console of the provisioned VDB can be find below: