Alright! With all of our tests passing, it’s time we roll our feature out to production!
YOUR STEPS FOR THIS SCENE
- With our testing success, it’s time to push our feature to production.
-
Repeat the merge and push steps for the
productionbranch - Click
masterand then chooseorigin/productionfrom the dropdown menu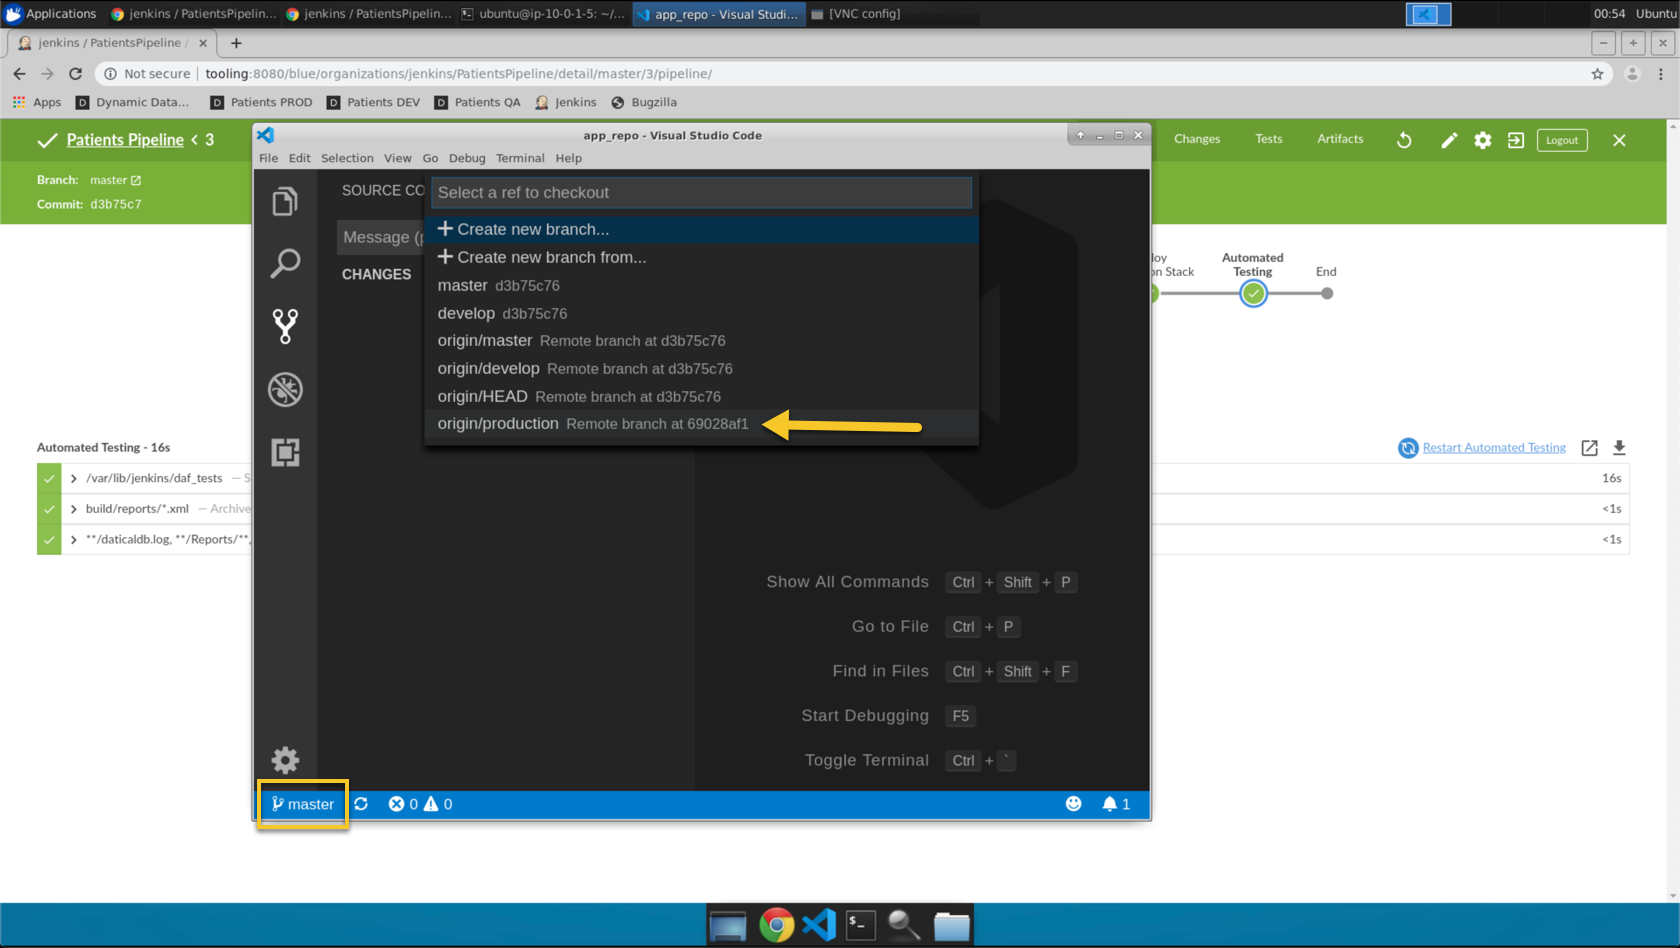
- Click
masterand then chooseorigin/productionfrom the dropdown menu
- Go to
View->Command Palette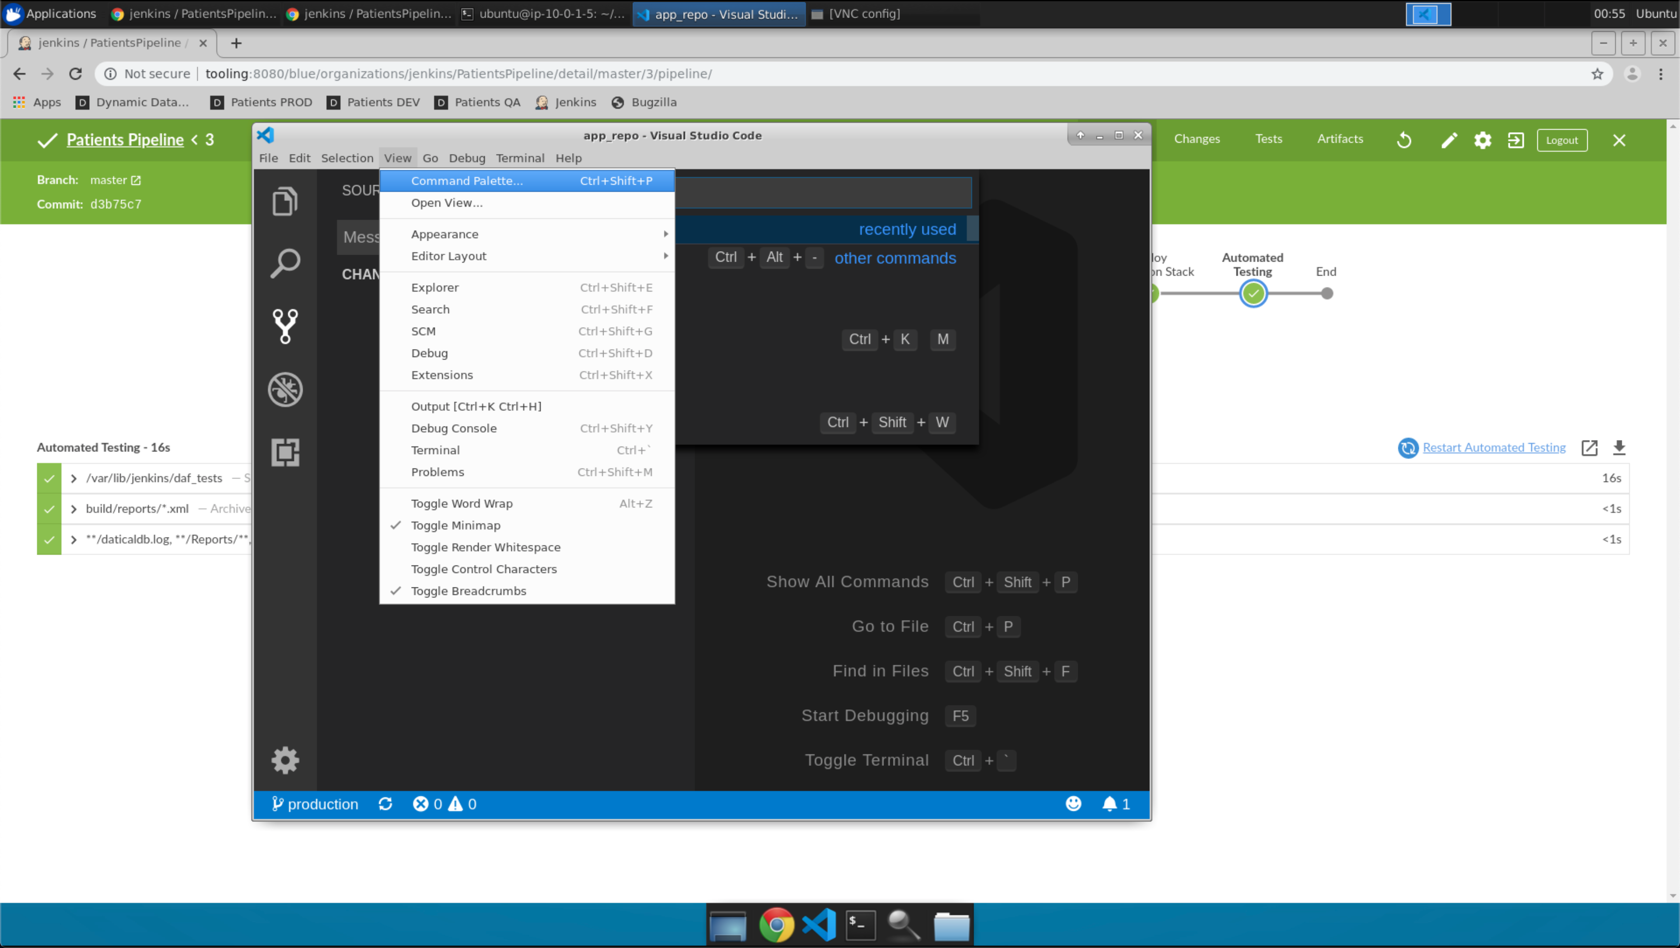
- Type
Mergein the drop down box and selectGit Merge Branch...from the dropdown menu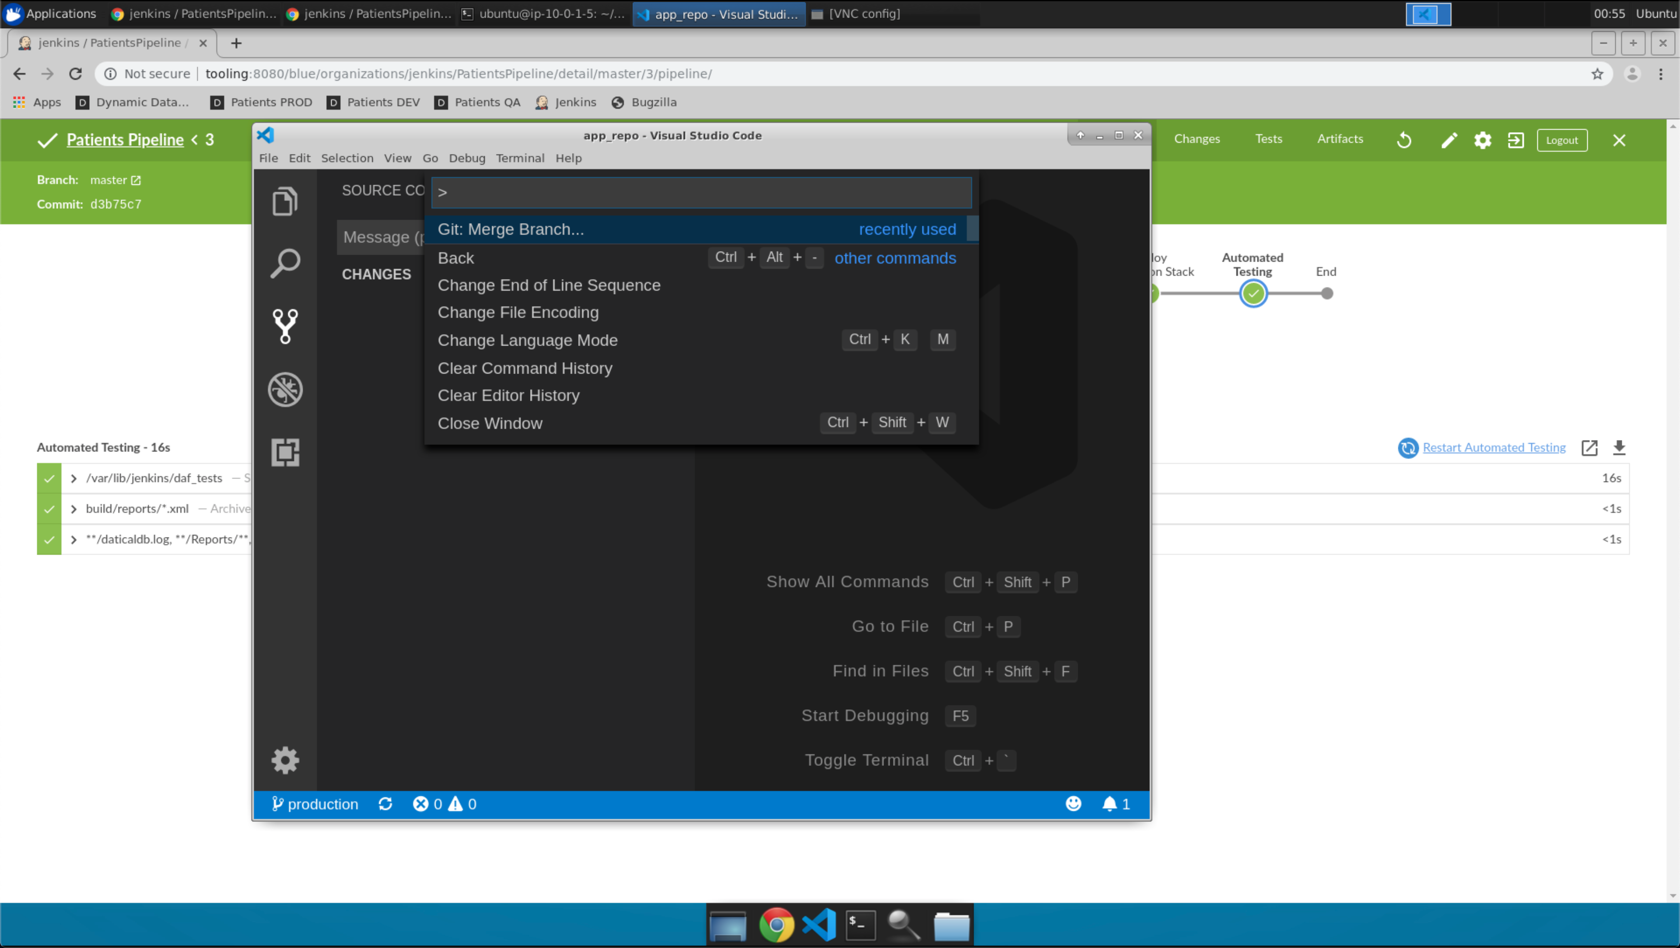
- Choose
masterfrom the dropdown menu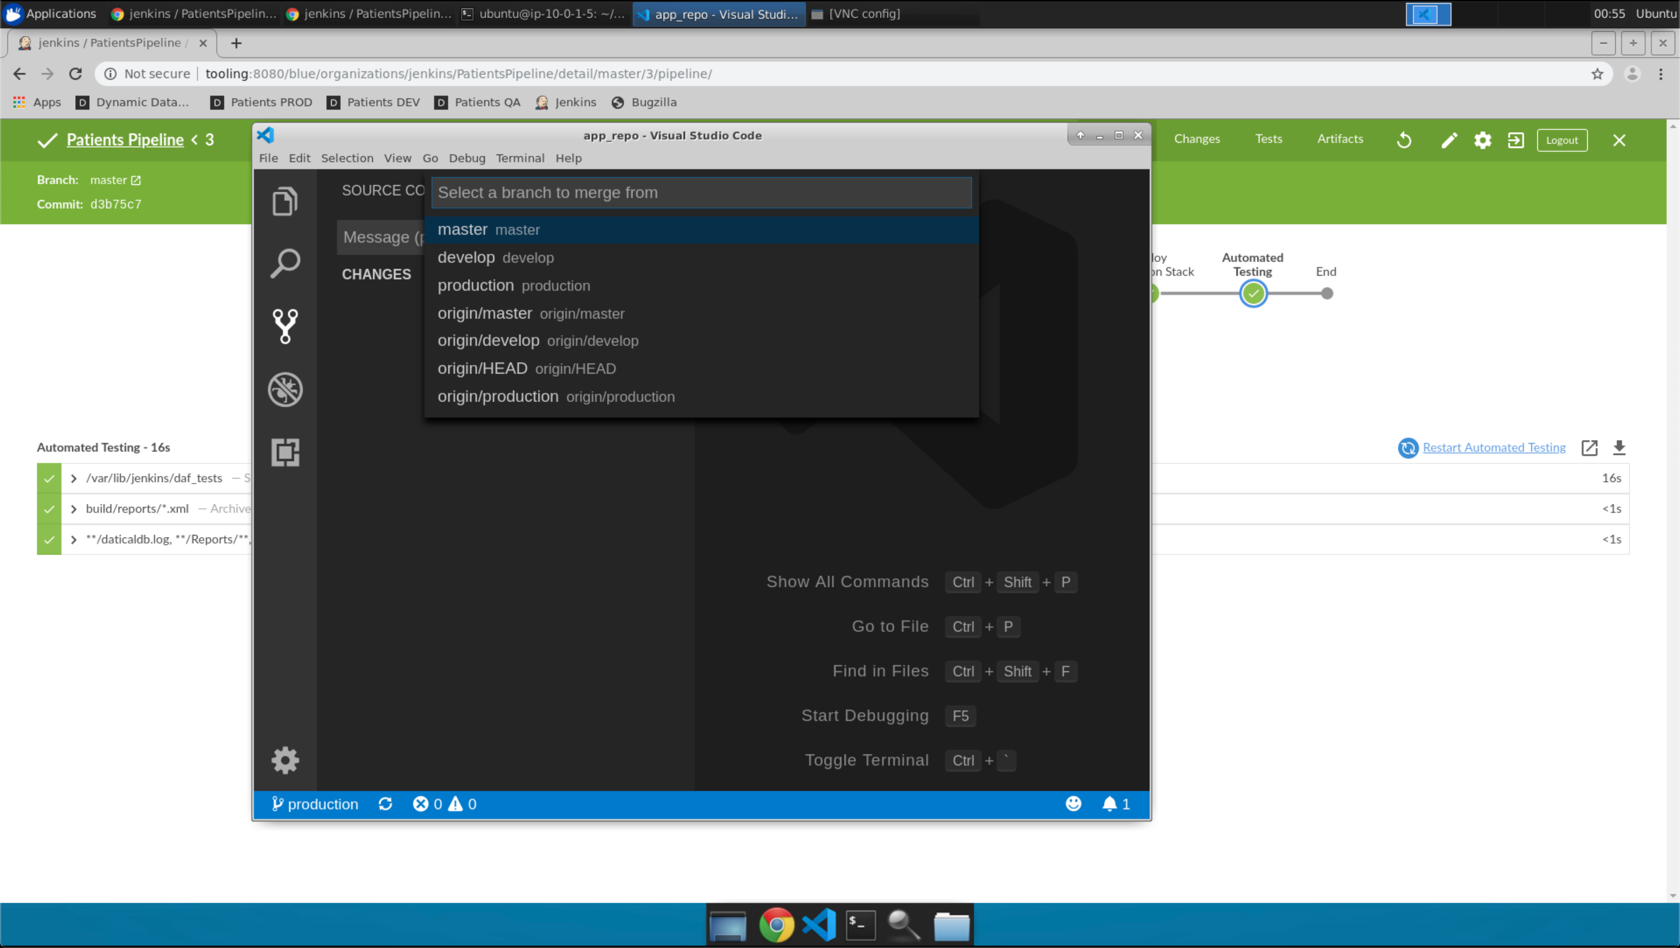
- Click the sync putton to push the changes. Click OK, if prompted.
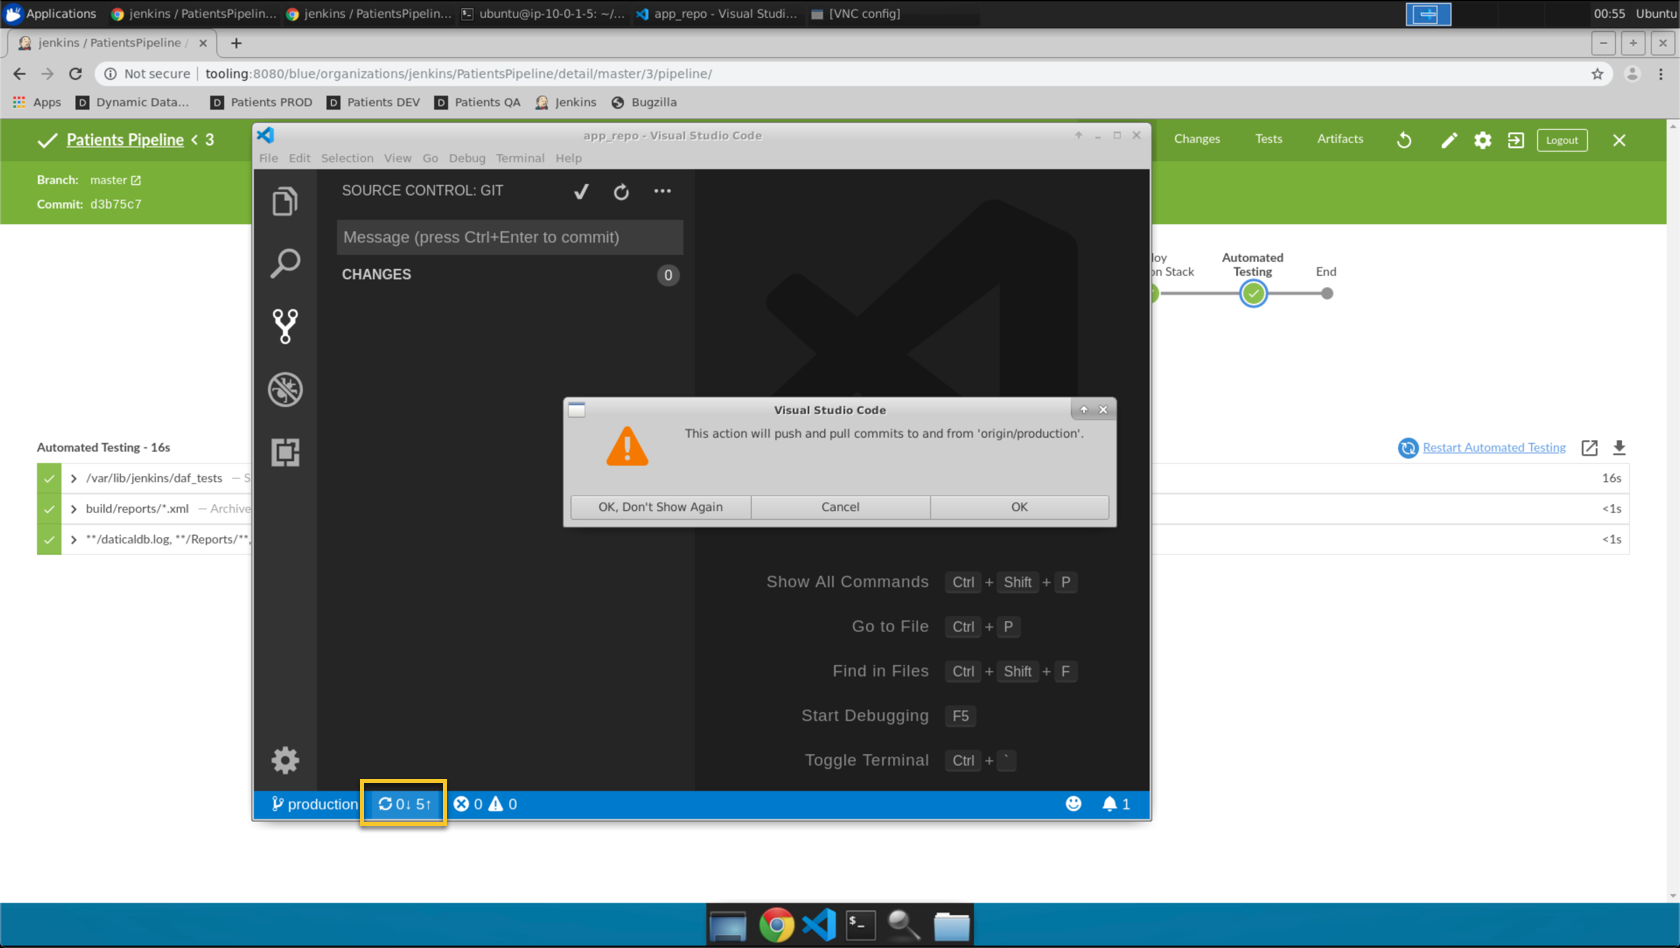
- Now you can watch the
productionpipeline job build in Jenkins.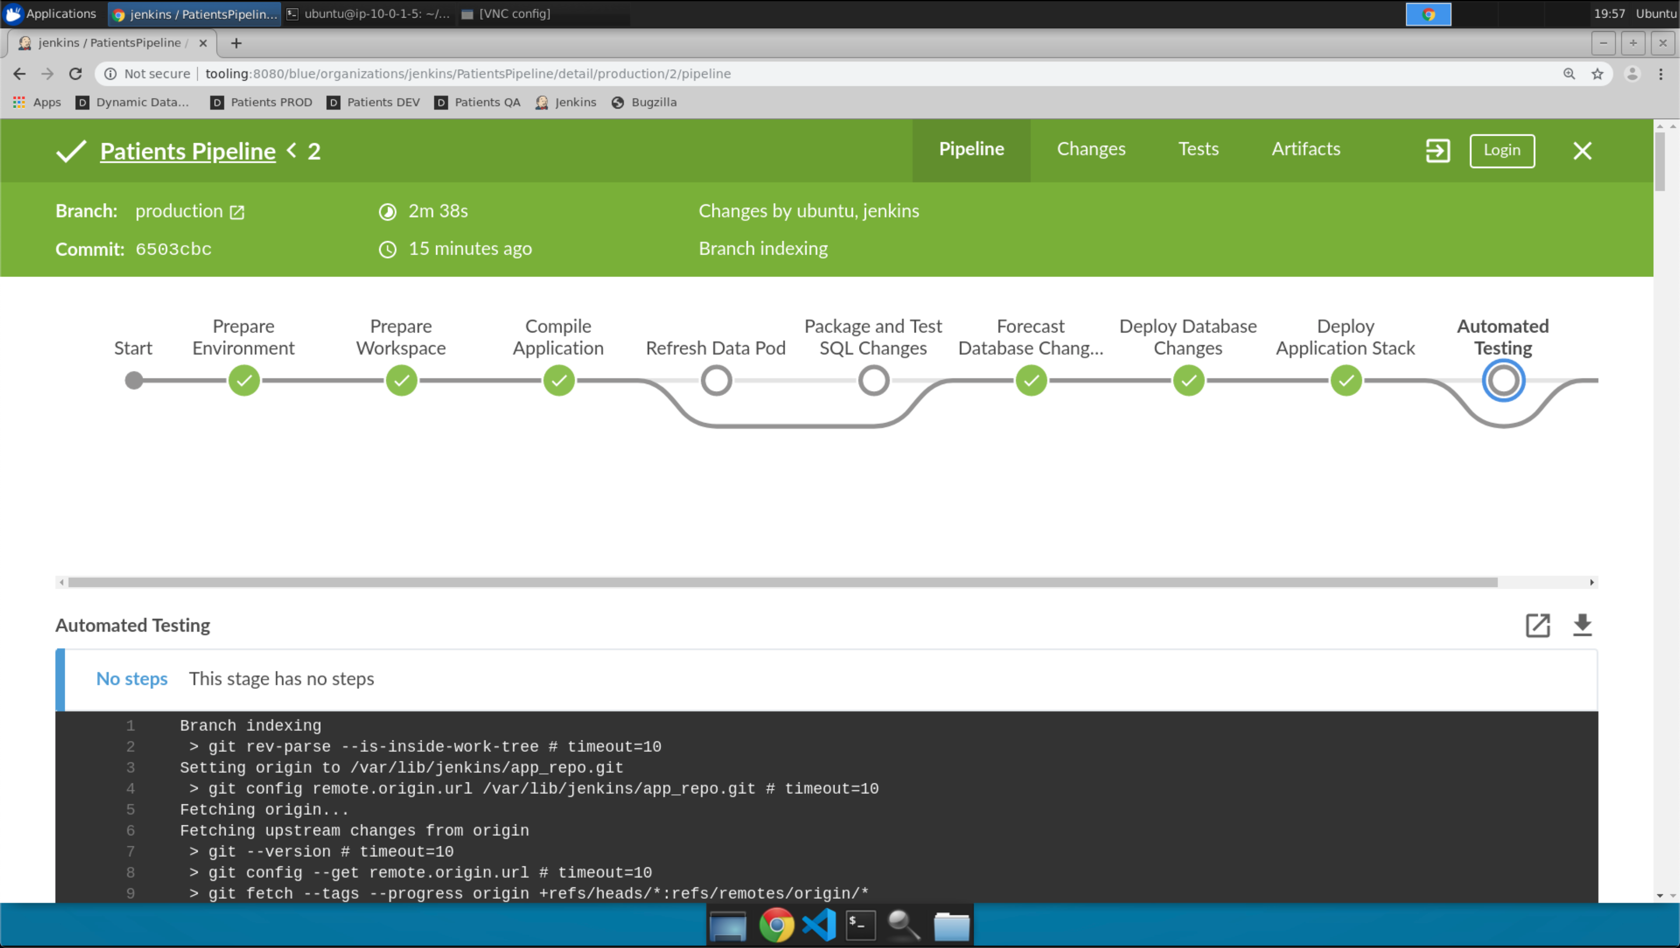
- Once the pipeline build is complete, click the
Patients PRODbookmark and login to the application. Search for your “ficticious user” from the very first scene of this workshop.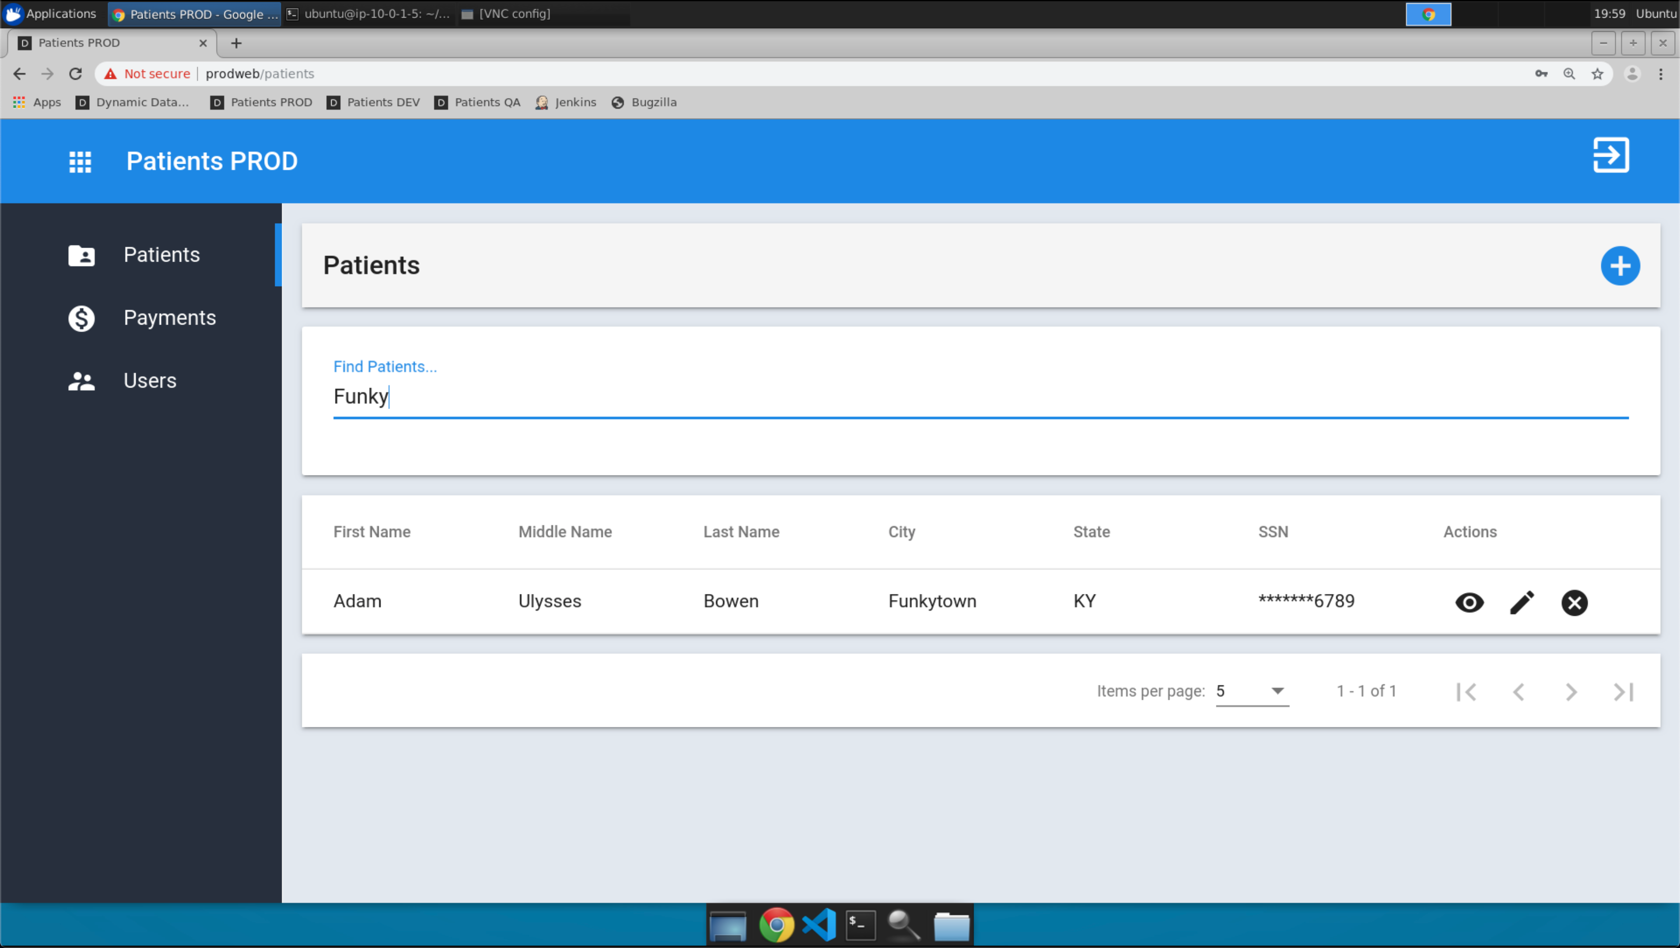
- Click view and validate you see the
Notesfield.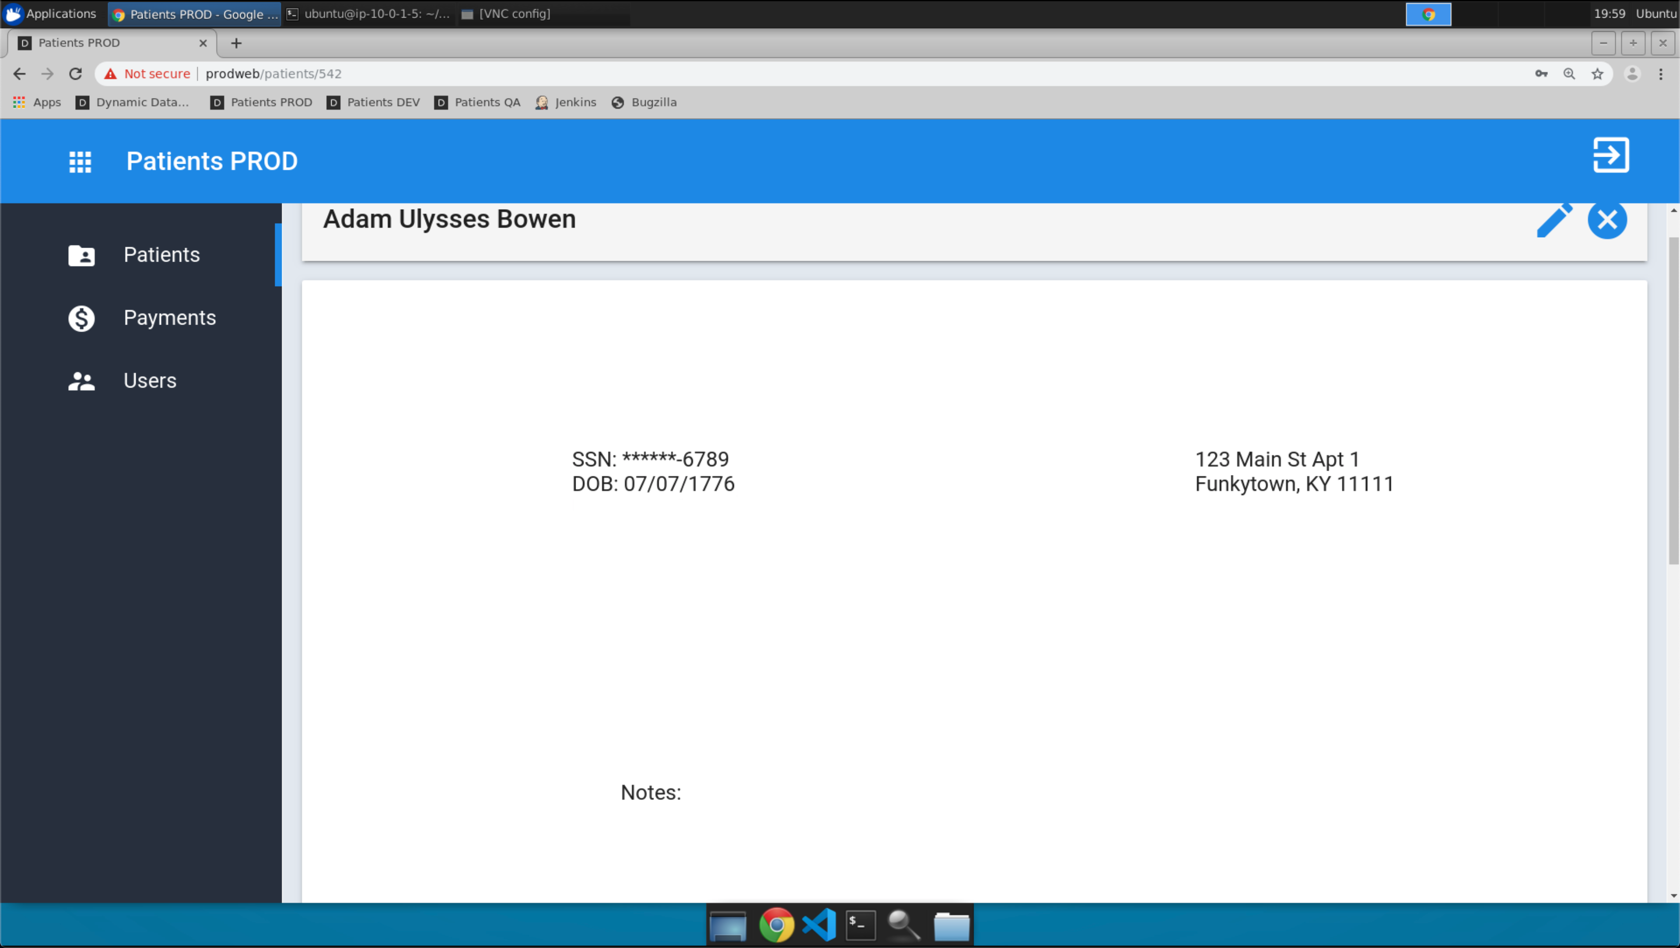
- Congratulations! You have successfully pushed your feature to production!
- With our testing success, it’s time to push our feature to production.
- Repeat the merge and push steps for the
productionbranch
git checkout production
git merge master
git push
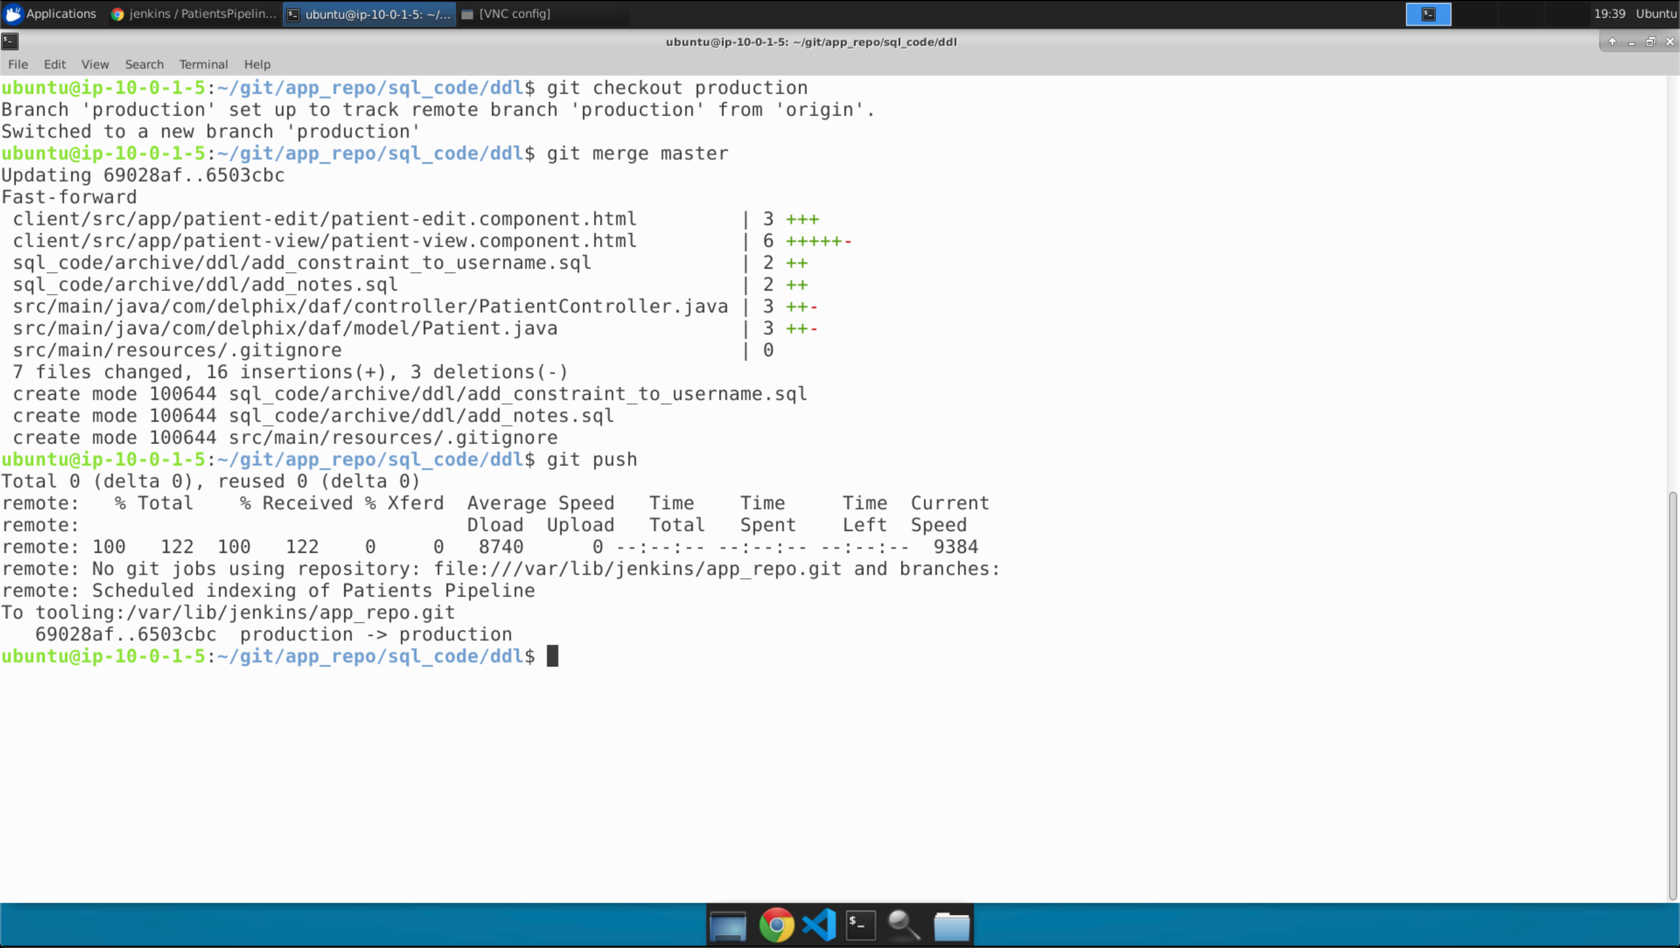
- Now you can watch the
productionpipeline job build in Jenkins.
- Once the pipeline build is complete, click the
Patients PRODbookmark and login to the application. Search for your “ficticious user” from the very first scene of this workshop.
- Click view and validate you see the
Notesfield.
- Congratulations! You have successfully pushed your feature to production!